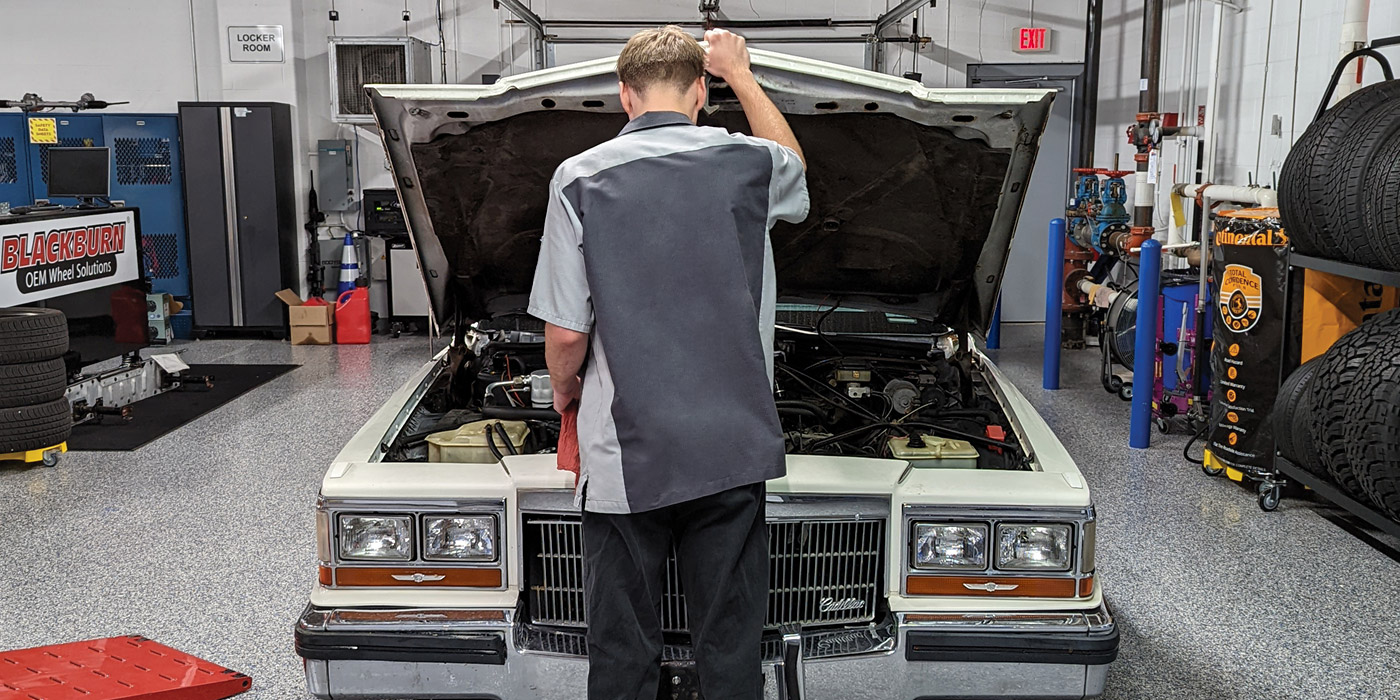
This month I’ve got some tips on installing coilovers.
When we think about upgrading a suspension, doing coilovers is a really great option. Not only can you get a set with great ride quality, but you also get that full adjustability that so many of us want. Since the GTI is getting coilovers, I thought that this would be a great opportunity to share some tips with you guys for installing coilovers on any car. Most of this also would apply if you’re replacing the suspension with factory components or with any kind of aftermarket spring shock absorber setup.
Tip #1: Use Proper Tools
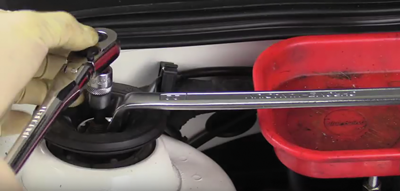
Most of this job can actually be done with hand tools and probably should be. It’s not recommended to use impact tools on the assembly side of a shock absorber. It can actually spin that internal housing and cause damage to the valving inside.
But since we’re going to be replacing the shock absorbers on the car, using an impact tool during disassembly is really not that big of a deal. These parts are going to get recycled anyway. And with 140,000 miles on the original shock absorbers, it’s time for a new set.
But if you’re installing coilovers on a newer car or might put the factory suspension back on it, you don’t want to use an impact gun. Also remember to get out your torque wrench when putting it back together. Proper torque is very important. Not properly torquing the fasteners can change the load on the bushings and bearings, and this can cause noise, premature wear or even ride-quality issues.
Note: Unless otherwise noted in your coilover kit, it’s a good idea to follow the manufacturer’s recommended torque sequence and torque specification. Some suspension components require the car to be on the ground in the fully loaded position before bolts are properly torqued.
Also, some may require a special tool to remove or install the shock absorber. They make special sockets that allow you to counter-hold the top of the shock absorber while tightening it down.
Tip #2: Replace Bushings and Bearings
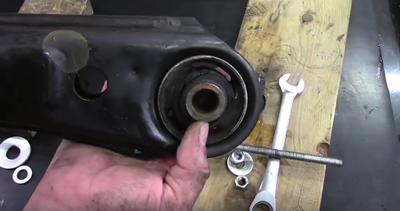
We’re going to be taking a lot of the suspension apart, so this is a great time to replace things like strut bushings, strut bearings, control arm bushings, sway bar bushings or even ball joints. On this car, because I had so much of the lower suspension out already, all of those things got replaced before doing the coilovers.
Now, I like to use poly bushings a lot. With proper lubrication and proper installation, they generally don’t make any noise. But if you simply want to replace them with the factory bushings, that’s cool too. The need to replace bushings really does depend on the mileage on your car. We’re at about 140,000 miles on this car, so it was the perfect opportunity to get everything new and refreshed.
On a car that’s newer, you may not need to replace all these parts, but it’s something worth considering. You’re going to have things apart, and you’re going to need an alignment anyway, which we’ll get to in a minute. But this can save you a bit of money later on by only having to align it one time.
Tip #2.5: Replace the Bolts
Many suspension bolts are torque-to-yield, so those have to be replaced. Odds are, on older cars you may be dealing with bolts that are oxidized, stretched or worn a little bit. This is a perfect opportunity to spend a couple extra dollars and get some new hardware.
In Figure 2.5 you see a strut bushing in a strut bearing. These components have a pretty high failure rate, not only on this generation of Volkswagen but a lot of other ones going forward. So, doing the bearings, I think, is almost a must. Ultimately, do a proper inspection on your suspension before putting your coilovers on and decide how deep you want to go into replacing bushings, bearings and hardware.
Tip #3: Maintenance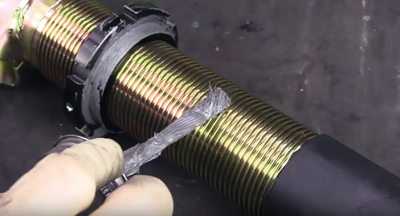
Like so many things, coilovers require maintenance. This maintenance actually does start on installation. Many coilover manufacturers call for putting anti-seize or other products on the body of the shock absorber to help prevent corrosion. And whenever you decide it’s time to adjust that suspension, it’s a good idea to clean it off and reapply it. I’m using plain old anti-seize, which works OK. There are some concerns of it building up dirt and debris, but if we’re maintaining our coilovers, it’s not too big of a deal.
Whatever you use, be sure to clean the threads and reapply it as needed or whenever you make an adjustment. This can really help if you’re ever dealing with corroded, frozen or seized coilover components.
Tip #4: Making Good Adjustments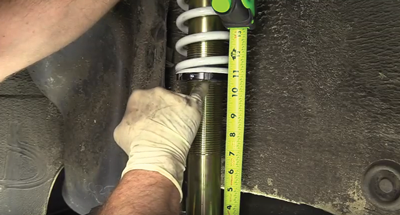
This is the beauty of having coilovers on a car — we get this full adjustability, some more than others. It’s incredibly important to take good before-and-after measurements. Setting the ride height accurately is crucial. Whether we’re doing this for looks or performance reasons, we don’t want to upset the balance of the car.
I like to get a baseline measurement before making any changes to the suspension. (You’ll probably want to know how much lower your car is.) We make the after measurement to be sure that all of our corners are lowered evenly.
So, how do we measure? For the before measurement, the best way to do it is to remove the center cap from the wheel and take your measurement from the center of the wheel to the fender. The other option that I really like, if your wheel allows it, is to use the lip of the wheel and make that same measurement. Doing it from the center of the wheel can provide a better fixed point than the wheel, but it can be a bit harder to make that measurement. After installing our coilovers, we want to find that exact spot and take the same measurement. This is what we’re going to use to compare to see how low we went.
After you have your coilovers installed, it’s best to find a fixed point on the car and take another measurement there. On the rear, we’ll use the axle beam mounting position to make our measurements. We’re measuring it from the axle to the bottom of the spindle piece on the coilover. We’ll use this to measure left and right to make sure that our numbers are the same.
You’ll also want to find that same fixed point in the front of the vehicle. This can be the center of the mounting point for the shock absorber or anywhere that’s fixed. You can also use kind of a rough measurement of counting the threads from the first thread at the bottom of the body of the shock absorber up to the adjustment spindle of the shock absorber. This works really well, too, to get it close, but I like to put a tape measure on it and get it a little more precise.
Note: You’ll want to lower the car down, roll it back and forth a few times, and let it settle out a little bit before taking these measurements.
It’s important to remember, too, that your suspension will most likely settle a bit, sometimes 5–10mm or 0.2-0.5”. So, after a week or two or some mild driving, you may want to bring it back in and take your measurements again to see if your suspension has settled. This is another reason why we may want to set the suspension a little bit higher than our end goal is going to be. We can always bring it back down more after the suspension has settled out.
Tip #5: Alignment
This might just be one of the most important tips altogether: Get your car properly — key word “properly” — aligned and make any other adjustments that may be needed. You have totally upset the suspension geometry of the car by lowering it. It was not designed to be at the ride height that you put it at, so it’s time to get all those adjustments back into specification. And it’s actually more than simply having the steering wheel off. It can cause poor tire wear, traction and/or handling.
There are multiple ways to do the alignment. At home, you can get it pretty darn close with a string alignment, but I highly recommend taking it into the shop and doing a proper alignment. You may also want to consider having it corner balanced as well, just to make sure the car is set up properly. Some of this depends on what your goals are for the car. If there’s going to be any track involved, auto crossing, or rally cross — this is a must.
There are also a couple other adjustments that you want to make after lowering the car. Things like checking the headlight aim, the brake bias and, if you have driver assist systems like adaptive cruise control, lane departure warning, collision avoidance, you’ll need to get those relearned and reset as well.
Also make sure your clearances are good. Make sure the wheel and tire assembly isn’t hitting this new coilover, the brake lines aren’t rubbing and the wires for the speed sensors aren’t having a space conflict.
Click HERE to watch the video on this process. If you have questions or concerns, post them below the video or send Charles an email at [email protected].