Hey everybody, this month I’m going to give you some tips on replacing the clutch disc, pressure plate and flywheel.
Replacing the clutch set is a pretty straightforward job, yet over the years, I’ve seen a lot of bad practices. Because I’m installing a new clutch on the GTI, I thought this was a great opportunity to share a few tips to make sure that the job goes well and your clutch lasts as long as it possibly can.
First, work in stages. You’ll find that this is actually a very common theme throughout the entire job. Whether you’re removing parts or assembling, you want to work in stages. You don’t want to just tighten one bolt all the way; you want to tighten bolts all together. What you’ll do is tighten one bolt halfway, then another, then another, then another. Once they are all half tight, then you’ll go back and tighten them the rest of the way. Then you’ll go ahead and torque them properly.
You also want to work in a diagonal pattern, very similar to when you’re tightening a wheel down. It’s easiest to start at your 12 o’clock position, and then work your way around the circle, but going across the middle. Most repair manuals will specify the pattern, but as long as you’re working diagonally back and forth, you’ll be okay.
When you’re tightening down the flywheel or the pressure plate, remember to work in stages and we also want to make sure that we’re not using impact tools when we remove or install these components.
Second, work clean. This is important whether you’re taking it apart or putting it back together. On the disassembly side, you have to remember that you’re working with some pretty nasty stuff. It’s not uncommon for a clutch to have asbestos, metallic powder, fiberglass, ceramic. All of these components are part of the friction material and the last thing you want to do is breathe in a bunch of that nasty stuff.
This is especially important when you’re dealing with a clutch that had catastrophic failure. You want to take really good care not to let any of that dust go up into the air. This also means you should not use compressed air to clean it. The recommended way is to use a water bath and capture the water. This is another reason that we don’t want to use pneumatic tools because the exhaust air coming out of the tool can blow that dust everywhere.
On the assembly side, we want to make sure that all of our surfaces are clean. The only place you want to lubricate is the splines of the clutch disc where the input shaft for the transmission goes. You need to be really careful not to put too much lubricant on those splines. Before you put the clutch assembly together, you want to make sure all the surfaces are free of oil, grease, brake fluid, old friction material, dirt and any grime. I always like to wear gloves during this job, but this may be a point where you switch and put on a new pair to prevent contamination from getting on any surfaces. Any of those contaminants can cause hot spots in the flywheel or pressure plate.
Third, pay attention to the most replaced parts. While a clutch set replacement is not hard, there are a lot of parts that you always want to make sure you replace whenever you’re doing the job. The first part you want to make sure you replace is the bolts. Many flywheel bolts are torque to yield bolts, which means that they’re one-time use. In the Volkswagen world, many of them have thread locker on the bolt when it’s new. While you can always add your own thread locker, if they’re torque to yield, you’ll want to go ahead and replace them.
While pressure plate bolts aren’t typically torque to yield, they do see a lot of heat cycling and stress, so it’s really a good habit to replace them, too. Many repair manuals don’t require those to be replaced, but I feel like it’s cheap insurance for a good clutch job. Anytime you’re going that far in, you also want to replace the release bearing, or what some people call the “throwout bearing.” This is essentially your connection from the clutch pedal to the pressure plate to engage or disengage the clutch. It has rotating parts and it makes significant contact with the pressure plate, so it becomes a must replace in my book. I would hate for someone to spend a bunch of time and money on replacing a new clutch kit just to find that they have a noise because they didn’t replace the throwout bearing (Figure 3b on page 23).
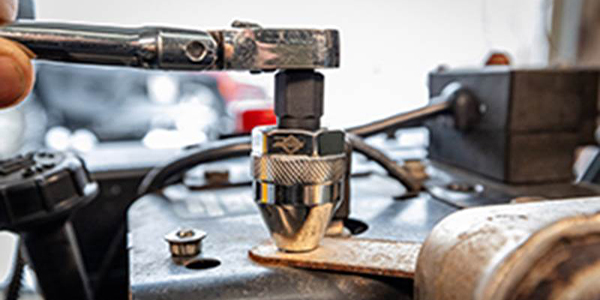
Fourth, torque everything. Doing a clutch job should really give your torque wrench a workout. Now, I am not a torque wrench purist and I don’t think every single component you put on a car really does need to be torqued, in fact, most air box screws have a torque setting and I’m not going to break my torque wrench out for that job. The clutch, however, is the one area you really need to pay attention to the repair manual and torque everything properly. If you don’t torque everything properly, not only are you running the risk of having some of the bolts back out or fail, but you will not have the proper even clamping force on the component you failed to torque. You may also want to have a torque angle gauge or a torque wrench that indicates angle for a torque setting, for example, of 60 Nm + 90 degrees.
Again, of course, this means no impact wrenches. Remember when you’re torquing these components, you want to work in stages and, of course, work diagonally across the component. It should go without saying, but make sure you’re using the clutch alignment tool when installing the clutch disc. The clutch alignment tool will center it to the crankshaft. If it’s not centered, odds are you’ll have a very difficult time installing the transmission.
Last, properly break in the clutch. This is a really important and often overlooked step, especially when you just did a really awesome build and all you want to do is go lay some rubber or really test out your car. The typical break-in time for a clutch is about 500 miles. This is about 500 miles of clutch actuation, not necessarily highway miles. After that 500 mark, you want to slowly increase the stress that you’re putting on the clutch. This is very similar to the proper technique for breaking in a new or rebuilt engine.
You do want to make sure that you’re using the clutch. We want those surfaces to all mate together happily, just try not to baby the clutch or try not to beat the heck out of it. If you fail to properly break in the clutch, it can lead to a shortened clutch life or reduced clamping force.
I’ll be very honest; that last one is one I really struggle with. Like I said, especially with a really cool build, all you’re wanting to do is go drive the crap out of it, but we’ve got to be nice to our clutch when we first install it.
If you want to watch this video, go to https://bit.ly/2rzaGt4. If you have any questions or concerns, post them below the video or send Charles an email at [email protected].

