Today, we’re going to start the diagnosis of a check engine light on my personal 2005 Volkswagen Passat.
As many other VW drivers have experienced, the check engine light came on in my Passat. I thought it would be a great opportunity to walk you through what my diagnostic process is when I get a car with a check engine light illuminated.
Note: This article discusses diagnosing this at home, not at the shop, but my process is not that much different from when I’m at work. For the video, click HERE.
For this job, we’re going to be using:
- My laptop;
- VAG-COM (which I also use at the shop all the time, unless it’s a warranty job);
- Flat blade screwdriver;
- Philips head screwdriver;
- Hose clamp pliers; and
- A little bit of brain power.
One of the first things we want to do when a check engine light comes on is evaluate the vehicle. If it doesn’t feel safe to drive, we don’t want to drive it. Generally that comes along with a flashing check engine light, but not always.
So, on my car there wasn’t any kind of driveability concern, the only weird thing I noticed is when I got home from work the day before it came on, the idle was a little high when I stopped in my driveway. It was about 300 rpm higher than it normally sits. Not something most people would have noticed, but it sort of caught my eye. I shut off the car and honestly didn’t think about it again until the next morning when the check engine light came on.
Next, we’re going to pull our faults using VAG-COM. We’re going into the engine to see what we have.
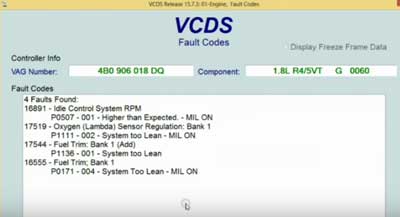
There are four fault codes listed. See Figure 1. They all sort of point to a fuel trim issue. When we have a system lean issue, we want to be thinking vacuum leak or reduced fuel pressure. It really depends on what engine we’re working with. This engine, the 1.8 Turbo Passat, is notorious for broken vacuum lines. There are a ton of vacuum lines under the hood of this car! All of them are prone to break; a lot of them are plastic that get brittle over time.
So we have four faults that we’re going to look at individually and as a group. Since all of these particular faults are related, we’re going to treat them as all one thing. Now that we know what our codes are, this is going to point us in the direction of what we need to do next.
Now I’m going to go into measuring value block 32. This is one of the key measuring value blocks in diagnosing fuel trim issues. (It’s not the only one to check, but it’s usually my first go-to one.)

What we’re looking at in measuring value block 32, field 1 is the at-idle fuel trim. See Figure 2. You can see a measurement of 6.6%. That means our ECM is compensating for something going on. Whenever the number in this field is positive, that means the vehicle is adding fuel to keep the engine running properly. If this were a negative number, that would mean we were pulling fuel away in order to keep the engine running properly.
The goal of the ECM is to make sure the engine is running as good as it possibly can while overcoming obstacles like vacuum leaks or weak fuel pumps. These can generally be seen by measuring value block 32.
As we move over to field 2, we notice this smaller number is also positive. Even off idle or part throttle, we’re adding fuel.
This is a value block that people tend to look at the wrong way. I recommend looking at it like “at idle” and “off idle.”
Our car is experiencing an at-idle problem, just sitting under no load only while running.
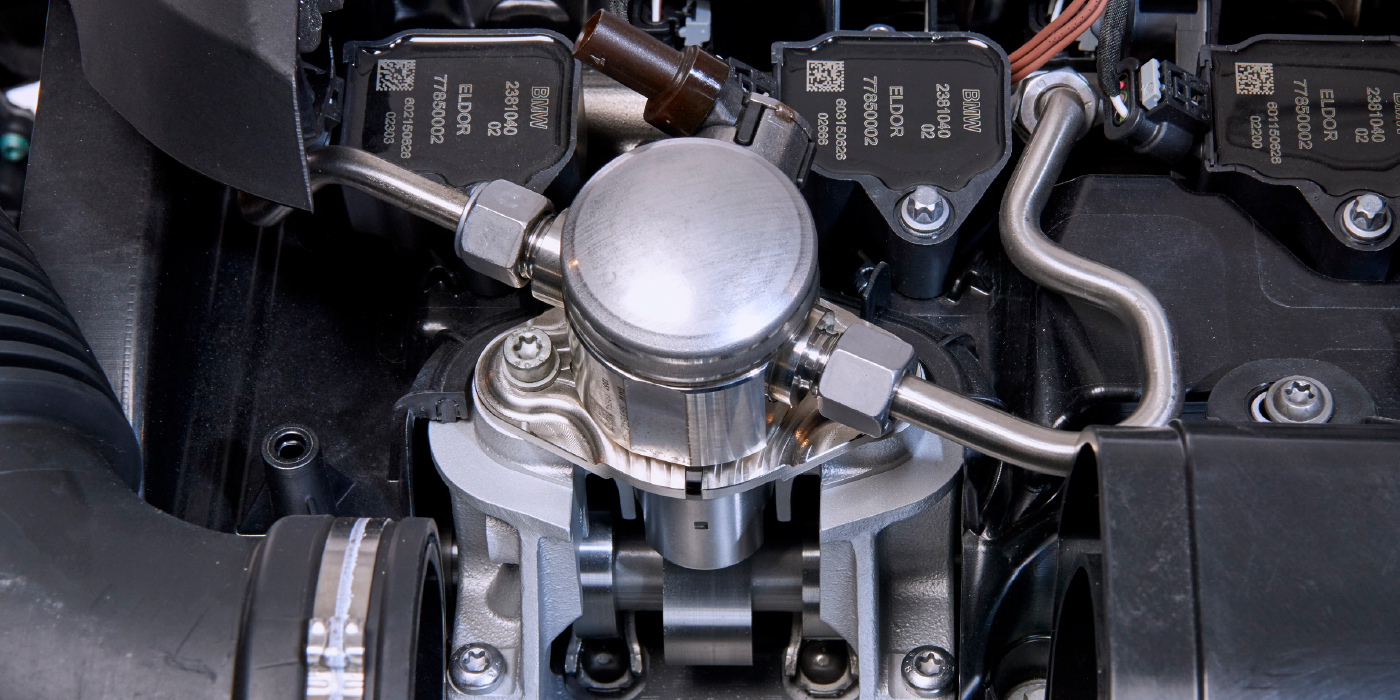
The next thing we want to do is take a thorough underhood inspection. Look for things like the dipstick not being pushed down or a loose oil cap (they don’t create quite the issue as in newer generation engines, but it’s still something we want to look at). Now we’re going to find all the vacuum lines under the hood and inspect them. They’re everywhere! So look near the airbox, near/under/behind the intake manifold as well as along the front of the car where we’re dealing with the diverter valve. The key here is taking your time and doing a good, thorough inspection.
When I start up the car, I can hear a slight hiss of a vacuum. I’m hearing it near the intake manifold, so I’m going to focus my efforts there.
I like to pull the coolant bottle off as well as the engine cover just to open up the engine bay a little bit and give me some more room to work.
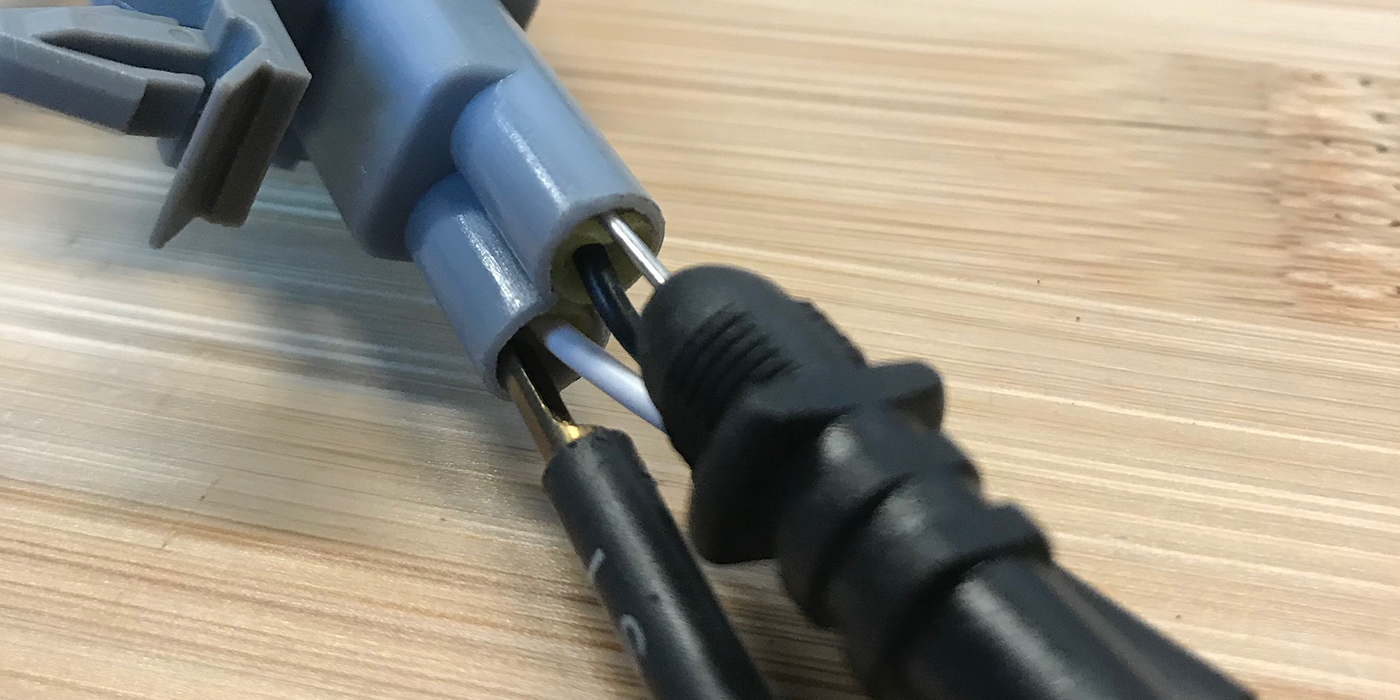
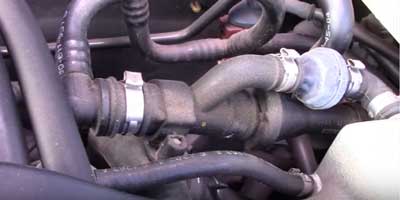
After that, I’m going to start at the back — a really good strategy is to take a flat-blade screwdriver, and poke very, very, extremely very gently on the vacuum lines! See Photo 1. You might find that a vacuum line breaks from that soft tough, and odds are that is what was your problem. You can start and focus your repair at that point.
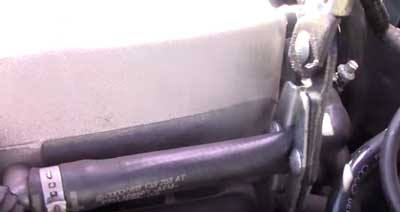
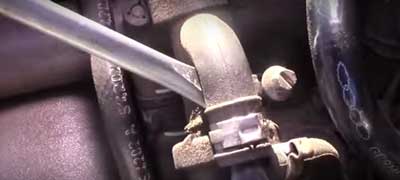
I’ve poked around and didn’t really find anything, so now I’m going to go to my next step — clamping off different vacuum lines with hose clamp pliers in order to affect the engine. Start with the easy ones. See Photo 2.
Now listen to what’s happening in the engine and check the VAG-COM readings.
Listen to what the engine’s doing. Is it changing rpms? Does it seem to smooth out the idle a little bit? Does the hiss go away?
Now let’s evaluate our measuring block 32 while we’re doing this. If we happen to come across our problem while we’re pinching off lines, we will probably see that field 1 and measuring block 32 start to drop and drop as the ECM sees that it doesn’t have to add as much fuel as it used to.
Depending on the size of your hose clamp pliers, you may not be able to get to all of the hoses. So your next step will be to start feeling around and trying to get to the point where we find something happen.
By taking the coolant bottle out, that gave me room to stick my arm under the intake manifold and feel around to see if I can feel air getting sucked in or find a weak point or a hole. You can also take carburetor cleaner or intake cleaner and spray it along the hoses, which can be a really good way to find a vacuum leak. If you hit one of those places that is leaking vacuum and pulling extra air in with some carburetor cleaner, it generally jumps the rpms up.
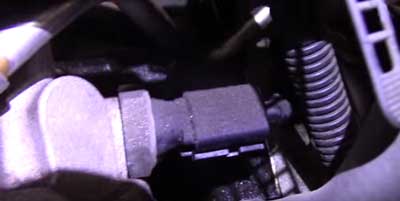
Before we get too involved we want to also take a look between the runners of the intake manifold and check out the PCV system. You can kind of see in Photo 3 that there’s a little bit of oil residue around the PCV hoses that come out of the oil filter housing and go to various locations throughout the engine. Because there’s this oil residue, we probably have some kind of leak in this area.
As I was accessing the hoses, part of the PCV system actually broke off in my hand, becoming our problem. The second I laid my hand on it, it shattered. The engine revved up, and while our fuel trim hasn’t actually changed, I could hear the car running quite a bit louder. So inadvertently I both found and made worse my check engine light problem!
The next step is going to be replacing these PCV hoses. It’s almost always recommended that when this hose breaks, we go through and replace all of them. They all have the same age and mileage on them.
Stay tuned for the article and video on the PCV hoses on a 1.8 Turbo Passat.
For another fun Humble Mechanic video, check out “5 MORE Odd Things Mechanics Use To Fix Cars.”
CrewMember Club
Since 2011 Humble Mechanic has been here to help with your car, from answering automotive questions, to producing DIY videos to help save money on your car. In those years I have brought you guys a ton of value. I also get requests all the time for folks wanting to support the show. I didn’t want to take donations, I wanted to keep bringing more value. That is why I started the CrewMember Club. This allows you to help support the show, and make an awesome return on your investment.
For about $0.17 a day, you can help support the hard work that it takes to produce the show. You can feel good about that! But I want more for you. I put together benefits that you can’t get anywhere else. These benefits can more than pay for your CrewMembership.
Click HERE for all the details.