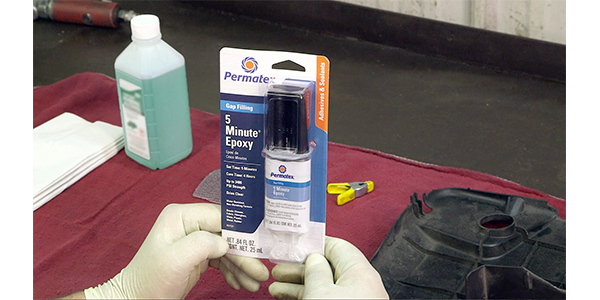
Epoxy adhesives are a valuable chemical tool that can save the day in the garage, in the shop or around the house. Whether in a liquid or stick form, epoxies can create bonds that are strong enough to last for the life of the items you’ve repaired. But to make sure you get the results you’re hoping for when you use an epoxy adhesive, Permatex advises all users to avoid these 10 common mistakes.
1. Not cleaning or sufficiently preparing surface
Like most any adhesive, epoxies work best when the mating surfaces are completely clean. Both surfaces should be free of grease, oil, dirt and other contaminants, and the surfaces need to be dry as well.
Be aware, some cleaners can leave behind a residue that will interfere with the epoxy bond. When you can, use solvents that won’t leave a residue such as isopropyl alcohol or acetone – but test these solvents first to check that they won’t damage a visible part of the repair item. Always wear solvent-resistant gloves, respirator and eye protection when using acetone.
2. Choosing the wrong epoxy for the job
Epoxies come in a variety of formulas. Pick the one that’s right for your job.
If you have a simple repair that won’t be subjected to high forces or stress, you can use a 60 second, general purpose epoxy. But if you need a higher strength bond, you should use a 30 minute, high-strength formula. It’ll take longer to set, but give you greater strength. A five-minute epoxy splits the difference in terms of the required cure time and the strength of the bond.
There are also specialty epoxies available for metals, high temperature applications, and plastics. Do the research and find the one that’s best suited for the repair you have to make.
3. Misjudging epoxy hardening time
Many DIYers use a five-minute epoxy and believe that it’ll harden in five minutes. The number of minutes in an epoxy’s name is not the time it takes to harden, but the amount of time that you have to mix it together, apply it and bring the repair pieces together (known as the “working time”).
The time that it takes to harden to the point where the repair is safe to handle (referred to as the “fixture time”) is longer than the “working time.” The time when the repair has fully hardened is the “cure time.”
The bottom line is – check the package directions to learn how much time the epoxy needs for working time, achieving fixture strength and full cure.
4. Not holding parts together long enough for proper bonding
A five-minute epoxy may need 10 minutes to fully harden. You may want to use clamps, rubber bands or weights to hold your pieces together, rather than try to hold them perfectly still for 10 minutes with your hands. Holding parts together by hand may result in a weaker cure due to hand fatigue that will not allow for constant pressure.
5. Not kneading epoxy sticks enough or too much
Epoxy sticks are two-part formulas with an inner and outer layer of putty-like materials. To activate the bonding, the two parts must be thoroughly kneaded together. If you don’t knead the two parts into a completely uniform color, you’ll have pockets of epoxy that never fully cure.
On the other hand, if you knead for too long, the material will start to cure before you apply it, losing its adhesive performance. Again, read the package instructions to get your timing right.
6. Applying epoxy to a smooth surface
It’s difficult for any adhesive to form a strong bond if the surfaces are too smooth. Whenever possible, rough up the mating surfaces before you begin to give the epoxy a surface that it can grip. You can use sandpaper or a mechanical tool to score the surfaces. Roughen the surfaces before you do your cleaning prep.
7. Mixing epoxy in an unsafe container
Epoxies heat up as they cure. Some can get hot enough to melt right through a disposable plastic cup. Choose a container that won’t melt or react with the epoxy.
Glass and ceramic are always a good bet, but don’t count on being able to get the residual hardened epoxy out. Pick a container you’re willing to toss when you’re done.
8. Letting epoxy dry in direct sunlight
Many epoxies will yellow if they’re allowed to cure in direct sunlight. Always cure in the shade, if possible. Epoxy that is fully cured will also yellow if left in the sun for long periods of time. If that will be cosmetically unacceptable, look for a different adhesive solution.
9. Using an epoxy to make an extremely thin repair
If you’re gluing a handle back on a ceramic mug, a really thin glue joint maybe more important than the high strength that epoxies provide. Epoxies are extremely strong, but they do create a bit of material thickness between the repair pieces.
For extremely thin repairs use a super glue (cyanoacrylate-based adhesive). For repairs where high strength and the ability to fill gaps or voids are needed, use an epoxy.
10. Not cleaning excess epoxy before it cures
Cured epoxy is really hard to get off most surfaces. In many cases, cured epoxy can only be removed mechanically or by scraping. Clean off any excess before it hardens.
Try not to let any epoxy cure where you don’t want it. If you do get uncured epoxy on your parts, wipe it off with acetone.
If the epoxy should harden where you don’t want it, heating it with a hair dryer or professional heat gun can soften the epoxy to make it easier to remove. Of course, this step may not help with high temperature epoxies.
If you get uncured epoxy on your skin, first wipe it off with a clean cloth or paper towel and then use a professional-strength hand cleaner and a lot of water to get the rest off.
Link: Permatex

