Hot weather is just a few weeks away in many areas of the country, and that means plenty of air conditioning service opportunities. Years ago, A/C was considered a luxury. Now it’s a necessity. Automatic climate control systems use A/C year-round for defrost and dehumidification as well as cooling. Even so, it’s hot weather that really brings out the A/C customers. In fact, you can usually count on your volume of A/C service work rising in direct proportion to the temperature.
When the A/C stops blowing cold air, most people can only tolerate the loss of cooling as long as the thermometer remains below 80 to 85 degrees and the humidity isn’t too bad. Beyond that, a trip in heavy stop-and-go traffic can be a near-death experience. As temperature and humidity go up, so does the level of discomfort. Eventually, the desire to remain perspiration-free will overcome a person’s desire to postpone repairs, and you’ll soon see their vehicle for service.
WHO ARE YOUR CUSTOMERS?
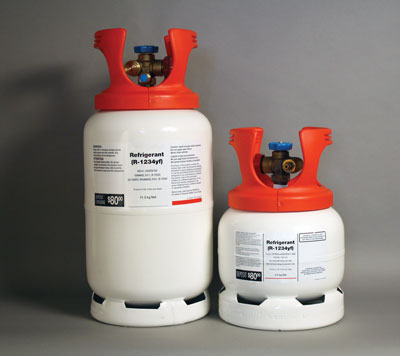
According to a recent survey by the Mobile Air Conditioning Society (MACS), approximately 40 percent of the vehicles that were serviced last summer for A/C-related problems were older vehicles (1994 and back) with R-12 A/C systems. The average odometer reading was over 100,000 miles! The rest were 1995 and newer vehicles with R-134a A/C systems.
The same survey also found that about 9 percent of the older vehicles were retrofitted to R-134a when they were serviced. A retrofit makes the most economic sense when major repairs such as a new compressor, evaporator or condenser are needed.
The average A/C repair job, according to MACS, was $504, plus another $176 if a retrofit was involved.
FLUSHING ISSUES
Another interesting finding of the MACS survey was that one out of four vehicles serviced ends up having the A/C system flushed either because the vehicle experienced a compressor failure or the system was found to be contaminated with sludge or debris. Most shops (92 percent) say they use liquid refrigerant to clean the A/C system, while only 5 percent reported using an approved flushing chemical.
Flushing is a profitable service and may be recommended for several reasons. One is to remove sludge from a contaminated system. Another is to remove debris following a catastrophic compressor failure. Flushing can also be used to remove excess oil from the system (too much oil can cause cooling problems). Approved flushing chemicals include liquid R-12 or R-134a refrigerant, or any of several products made by various companies.
One of the advantages of using an approved flushing chemical is its stronger cleaning action. Ordinary refrigerant alone may not be enough to remove accumulated sludge, but it is effective for removing excess oil from the system. (If the system has been overcharged with oil or the oil is contaminated.)
No one questions the benefits of flushing, but some OEMs question its effectiveness and safety. Ford and GM both say flushing is OK for their A/C systems provided the procedure is done correctly (no use of anything but approved chemicals to flush the system, and not attempting to flush compressors or parallel flow condensers). But Toyota and several other import manufacturers do not agree, and do not approve of flushing. If the A/C system is contaminated, Toyota says to replace the contaminated parts.
One caution is that flushing will not remove all the metallic debris from a contaminated system. That’s why many experts recommend installing an in-line filter in the liquid line to trap any residual debris that a flush may have missed, and a screen filter in the compressor inlet (suction) hose to stop any particles that might be sucked into the compressor from the evaporator.
Parallel flow condensers, and those with extremely small passageways, are nearly impossible to flush with refrigerant or solvents. On these applications, the condenser may have to be replaced if there is a risk of contaminating the new compressor.
Several compressor manufacturers say flushing is a good idea when replacing a compressor to prevent a repeat compressor failure. Some recommend using “closed loop” flushing equipment that has filters to keep contaminants from re-entering the system once they’ve been removed. A flush gun that uses shop air usually contains humidity and oil vapor – two things you don’t want to reintroduce into an A/C system. Hoses with mufflers, orifice tubes and expansion valves should not be flushed. These parts should be replaced if the system is contaminated or the compressor has failed.
FINDING LEAKS
Finding refrigerant leaks is a major aspect of A/C service. It makes no sense to recharge a leaky system with refrigerant if it will soon leak back out.
Ultraviolet dyes can make even the smallest leaks clearly visible. But some OEMs do not approve of their use. The only import vehicle manufacturer who has publicly endorsed the use of dye is Nissan (since 1999). Honda, Mazda, Toyota, Hyundai and Mercedes-Benz currently do not use or endorse the use of dye to find leaks. The domestic OEMs (Ford, GM and Chrysler), on the other hand, all use and approve the use of dyes. Go figure.
On reason some of the import OEMs are leery of dye is because using too much may dilute the compressor lubricant and increase the risk of compressor noise and failure. The standard recommended dose is only one-quarter ounce! A second dose won’t usually result in any problems, but multiple doses over a period of time can overload the system with dye and cause trouble.
SEALERS: STILL A STICKY SUBJECT
In recent years, various sealer products have been introduced to stop refrigerant leaks. Such products are marketed as an inexpensive way to fix troublesome refrigerant leaks. Some of these products are activated by exposure to moisture, others stop leaks by causing seals and O-rings to swell, and some combine both approaches.
The main drawbacks of using a sealer are the risk of a comeback if sealer fails to stop the leak, clogging up service gauges and recovery/recycling equipment (filters are available to protect your equipment), and plugging the orifice tube if the system is contaminated with air and/or moisture. Because of these risks, no vehicle manufacturer, import or domestic, currently approves the use of sealer products. Yet, there is a demand for these products.
Evaporator leaks can be expensive to fix because the labor alone may be 8 to 12 hours or more depending on the application. For customers who can’t afford such a repair, a sealer may offer a less expensive fix – though no promises should be made as to how long the leak repair will hold or if it will seal the leak at all.
The best cure for a leaky evaporator is to:
Replace the evaporator with a new one;
Thoroughly flush the hoses and condenser to remove as much contamination as possible;
Replace the accumulator or receiver drier (which contains a bag of moisture-absorbing desiccant to protect against further corrosion);
Replace the orifice tube since the old one is probably dirty or plugged;
Install an in-line filter in the liquid line to trap any contaminants that were not removed by flushing;
Suck all the air and moisture out of the system with a vacuum pump once everything has been reassembled; and
Recharge the system with a fresh dose of clean refrigerant and compressor oil.
When evaporator leaks are caused by external corrosion, the culprit is often an accumulation of leaves and debris in the evaporator case. The debris traps moisture and promotes metal corrosion. It may also jam the fan and cause noise or blower motor failure, too. Some vehicles do not have screens to keep debris from entering the HVAC inlet. Others have “cabin air filters” that not only stop debris, but also dust, pollen, bacteria and even odors from entering the passenger compartment. Many motorists have no idea if their vehicle has a cabin air filter or not, let alone where it might be located or how to replace it.
Cabin air filters are usually positioned behind the glove box or at the base of the windshield in the cowl area. The cabin air filter is an important filter to maintain because restrictions can affect the operation of the climate control system, yet it is often overlooked when other A/C service work is done. The recommended replacement interval for an activated carbon odor absorbing cabin filter is typically once a year or every 12,000 miles. Plain pleated paper dust filters can usually go two years or more before a change is needed.
REPLACING A COMPRESSOR
The only rule you have to know about replacing compressors is that there are no rules. Some compressors are shipped dry, others are shipped with assembly oil (which must be drained prior to installation) and others are shipped with mineral oil for R-12 applications, a specific type of PAG oil for OEM R-134a applications, or polyester POE oil for a retrofit. Make sure you read the instructions that come with a compressor so you can determine if oil needs to be drained or added before installation.
Most compressor manufacturers will void their warranty if the wrong oil is used, if the compressor is installed in a dirty system (contaminated systems must be flushed with refrigerant or an approved solvent, and a filter installed), if a non-approved flushing chemical is used to clean the system, or the accumulator or receiver-drier is not replaced.
Some replacement compressors may not look or fit quite the same as the original. This should not affect cooling performance, but can create installation hassles if you have to re-route hoses or modify brackets. Because of this, many technicians prefer to buy a compressor that is the same as the OEM compressor (same brand and/or same fit). Some compressors come with new clutches and others do not. Most experts recommend replacing the clutch on high-mileage vehicles to minimize the risk of a comeback. Clutches do wear over time and can cause cooling problems if they slip or fail.
CONDENSERS
You may have to replace a condenser if it is leaking, damaged or the A/C system is contaminated. If the condenser is not the type that can be completely flushed, don’t take chances. Replace it.
Replacement condensers should have the same cooling capacity as the original to maintain the same cooling performance. With some retrofits, installing a larger or more efficient condenser will help offset the slight loss in cooling effectiveness when switching refrigerants.
On 2001 and up Toyota and Lexus, the condenser has a “subcooler.” The condenser is divided into three parts. Refrigerant enters the top chamber as a high-pressure gas. It then passes through a receiver/dryer to separate gas bubbles and liquid, then flows into the bottom subcooler chamber to “super cool” the liquid. This assures complete liquification for better cooling performance.
These subcooler systems no longer have a separate receiver/dryer or sight glass. The dryer is located inside the tank on the side of the condenser, and the filter is serviceable. But the cap at the bottom can be tricky to remove. The threads are aluminum, so remove it carefully.
RECHARGING THE SYSTEM
Charging accuracy is also essential to get the best cooling performance from an A/C system. The refrigerant capacity of most passenger car systems today is only about 1-1/2 pounds or less. Consequently, it is easy to accidentally over-charge the system. Charging equipment with long hoses may contain 4 to 6 ounces of refrigerant in the hoses. If this extra amount is not taken into account, you may end up adding too much refrigerant.
Complete evacuation of the system is also a must before you add the refrigerant. Air is a non-condensable gas that reduces the operating efficiency of the system. Moisture is a contaminant that reacts with refrigerant and compressor oil to form acids and sludge. If not removed, air and moisture will cause problems sooner or later. The normal vacuum cycle during refrigerant recovery is only about five minutes, which is not long enough to thoroughly evacuate all the air and moisture from the system.
Most experts say it takes 29.7 inches or more of vacuum for 45 to 60 minutes to completely purge the system, 60 to 90 minutes for dual (front/rear) A/C systems, and up to two hours to purge a contaminated system in a colder or humid climate. The accumulator or receiver drier should also be changed if the system has been open or without a charge for a long period of time.
Another suggestion: If air contamination has been causing noise or other problems, deep vacuum purge the system and recharge it with virgin refrigerant rather than recycled refrigerant. Why? Because recycled refrigerant may contain two to three percent air.
|