 When was the last time you tested a customer’s brake fluid? Never? Many shops don’t bother to test brake fluid for several reasons. Some don’t think fluid tests are necessary. Others don’t test the fluid because they don’t have anything to test it with. And others say why bother if they’re going to bleed the brakes after relining the brakes?
If you’re not testing brake fluid for any of these reasons, you may change your mind after reading this: Brake fluid doesn’t last forever. It wears out. The fluid becomes saturated with moisture that lowers the fluid’s boiling temperature and increases the risk of fluid boiling in the calipers. This may cause the pedal to go all the way to the floor under hard braking, possibly resulting in an accident!
Brake fluid also becomes contaminated with acids and sludge when the corrosion inhibitors in the fluid breaks down due to high operating temperature and chemical attack. This can accelerate pitting and corrosion inside the calipers, wheel cylinders, brake lines and master cylinder, and cause expensive damage to the ABS modulator and valves.
Still think brake fluid checks aren’t necessary?
OK, so you agree it’s wise to check the fluid. This requires some special tools because you can’t tell much about the fluid just by looking at it. New brake fluid may be clear to amber colored or dyed brown. The fluid will typically become darker as it ages, but this doesn’t necessarily mean it is contaminated. If you see rust or sediment in the fluid, the fluid is long overdue for a change.
One way to “see” how much moisture is in the fluid is to use a brake “refractometer.” This is a precision optical instrument that uses the fluid’s “refractive index” to reveal its condition. Moisture alters the way the fluid bends light, making it easy to “see” the amount of contamination on a scale in the eye piece. To check the fluid, all you do is put a couple drops of fluid from the master cylinder on the instrument’s prism, lower the sample cover and look through the eye piece. The refractometer scale will be calibrated for DOT 3 or DOT 4 fluids.
Another way to check the condition of the fluid is with a brake fluid tester. There are two basic types of testers. Some measure the fluid’s electrical resistance to give a “good” or “bad” indication of its moisture content. The limitation with this approach is that the tester may be fooled by the presence of certain additives or contaminants in the fluid. Others actually boil a small sample of fluid to calculate the fluid’s approximate boiling temperature. The results may vary a few degrees if you repeat the test due to the calibration limitations of the instrument.
One brake fluid tester manufacturer says DOT 3 fluid should be replaced if the boiling temperature is 312° or less, or 340° for DOT 4 fluid. If you don’t know what type of fluid is in the system (DOT 3 or 4), then replace it if the boiling temperature tests less than 329°.
Some say the best method for testing the fluid is to use special chemical test strips. There are two basic types, and both change color when dipped in the brake fluid. The color of the strip is then compared to a chart to determine the moisture content of the fluid or the chemical condition of the fluid.
One supplier of brake fluid chemical test strips says their product measures the “virtual age” of the fluid according to the level of amines or reserve alkalinity (which indicates how much corrosion inhibitor is left), the level of thermal oxidation that has occurred in the fluid, and the presence of metal oxidation catalysts in the fluid. The virtual age of the fluid has nothing to do with its actual age or the mileage on the vehicle. The brake fluid in a one-year-old SUV with only 15,000 miles on the odometer may have aged as much as the fluid in a three- or four-year-old car with 30,000 to 40,000 miles on the odometer if the SUV has been subjected to harsh operating conditions such as extreme heat and/or extreme humidity.
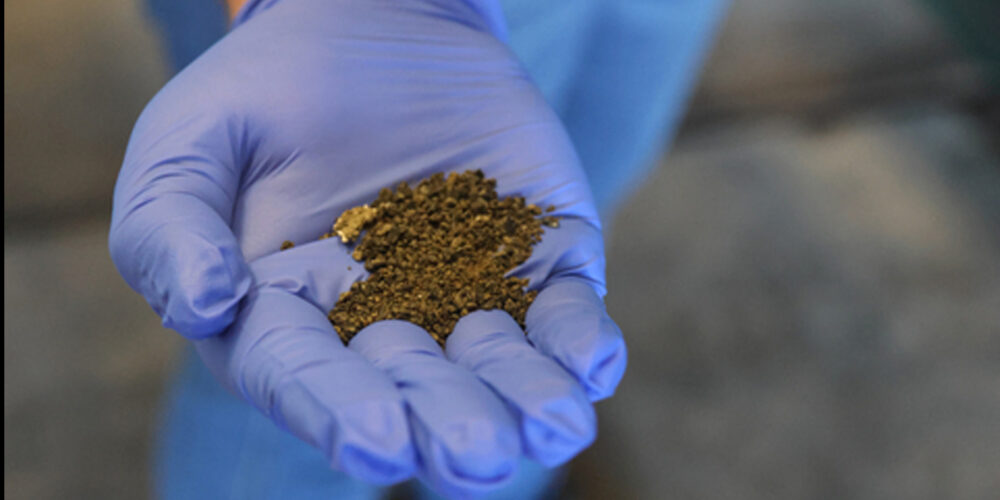
The test strips that check the chemistry of the fluid typically reveal the presence of copper in the brake fluid. When the corrosion inhibitors break down, the copper brazing alloy inside the brake lines tends to leach into the fluid. Copper is not present in new brake fluid, and is the first metal that starts to dissolve when corrosion attacks the brake lines. As a rule, brake fluid should be replaced if the copper content exceeds 200 ppm (parts per million).
FLUSHING & BLEEDING
Though the fluid should be flushed when the brakes are relined or serviced, many shops skip this important step to save time or because they’re not convinced it is necessary. Don’t make the same mistake! Many of these same shops have comebacks because of the old contaminated brake fluid that was left in the system.
Also note that “bleeding” the brakes is NOT flushing the brakes. Bleeding only removes air from a line, caliper or wheel cylinder. It does not necessarily remove all of the old contaminated fluid from the brake circuit or the entire system. Bleeding is often required after replacing brake components because air is compressible and will make the brake pedal feel soft and spongy.
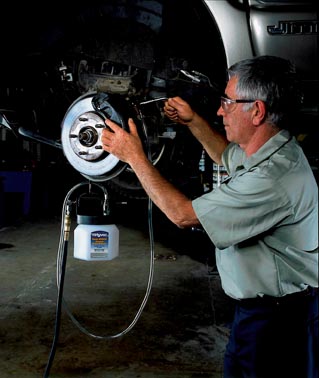
Flushing out all of the old fluid will not only remove moisture and solid contaminants, but also reduce or eliminate the need to bleed the individual brake circuits. You can use a power bleeder, vacuum siphon tool, an injector tool (that can do both pressure and vacuum bleeding and flushing) or even gravity bleeding to replace the old fluid. If using a vacuum bleeder, be sure to keep the master cylinder reservoir filled so air isn’t drawn into the system.
Air-operated power bleeders, electric power bleeders and hand-operated pressure bleeders are all available for flushing the brake system. Air bleeders run off the shop air supply and use a portable tank to pressure the brake system. Electric pressure bleeders have a 12-volt electric motor to pressure the system. The smaller (and less expensive) hand pressure bleeders use a hand pump to pressurize the system. Various adapters may be required to connect the power flusher to the fluid reservoir cap opening on the master cylinder. On some vehicles, the metering valve or “hold-off” valve must also be held open while pressure bleeding because the power bleeder doesn’t generate enough pressure (usually 15 to 20 psi) to open the metering valve by itself.
Vacuum bleeders that run off shop air or use a hand pump can also be used to pull fluid through the system rather than push it. The vacuum bleeder is attached to the bleeder screw on a caliper or wheel cylinder to pull fluid from the master cylinder. One advantage with this type of equipment is that you don’t need an assortment of adapters for various master cylinder reservoirs.
Another option is to use an “injector” tool that can either pressure flush or vacuum bleed the brake lines. The injector tool comes in several versions including hand-operated and pneumatic. The same tool can also be used to bench bleed master cylinders, clutch master and slave cylinders and hydraulic clutch lines, to leak test hydraulic components, such as automatic transmissions and ATF coolers, to bleed and flush power steering pumps, lines and gears, and to meter and inject various fluids and gases.
On some ABS-equipped vehicles, you may also need a scan tool to cycle the ABS solenoids so trapped air can be vented from the ABS hydraulic modulator unit. Some modulators have special bleeder valves that can be opened to vent air. Others do not and require cycling of the solenoids to remove unwanted air.
Other items you’ll need to flush the brakes include some clear plastic tubing for routing the old fluid from the bleeder screws to a catch pan or storage container, and some bleeder screw wrenches.