Tech Tip: Eliminating Toyota Air Conditioning Evaporator Odor

Tech Tip: Eliminating Toyota Air Conditioning Evaporator Odor

A musty odor may be emitted from the air conditioning system of some vehicles that are usually operated in areas with high temperature and humidity. It’s most noticeable when the air conditioner is first turned on after the vehicle has been parked for several hours.

A musty odor may be emitted from the air conditioning system of some vehicles that are usually operated in areas with high temperature and humidity. It’s most noticeable when the air conditioner is first turned on after the vehicle has been parked for several hours.

The odor could result from one or more of the following conditions:

1. Blockage of the evaporator housing drain pipe, resulting in a buildup of condensate.

2. Microbial growth in the evaporator, arising from dampness in the evaporator housing where the cooling airflow is dehumidified.

To address excessive air conditioning evaporator odor, check the evaporator housing drain pipe for blockage. If no problems are found, the evaporator and housing should be cleaned and disinfected using the following service procedure.

While this procedure may be used on any Toyota vehicle, specific details for the 1997-and-older SXV/VCV10 Camry follow.Caution: Wear safety glasses, protective mask and gloves while working with the freshener.

Service Procedure:
1. Parts removal.

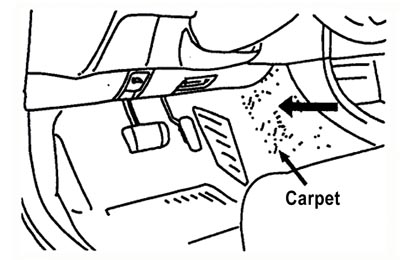
a. Pull down the carpet from the center console as indicated by the bigger arrow in Fig. 1.
b. Remove the plate on the side of the heater unit using steps (1) and (2), indicated with bigger arrows to show direction in Fig. 2.
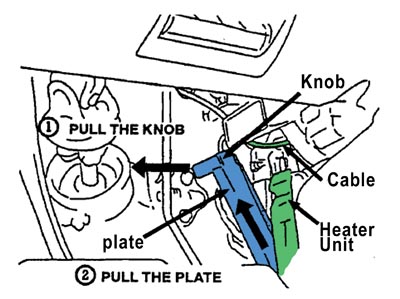
Caution: Do not bend the cable; the plate will be reused.

c. Remove the blower resistor.

2. To clean the evaporator, follow the general procedures at the beginning of this bulletin. Also see Fig. 3.
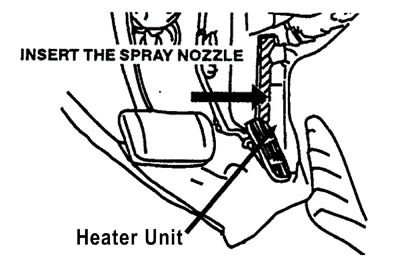
3. Parts reinstallation.

a. Reinstall the plate on the side of the heater unit using steps (1) and (2), indicated with bigger arrows to show direction in Fig. 4.
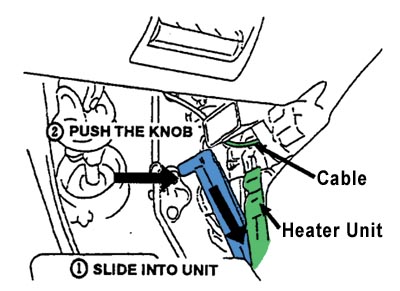
Caution: Confirm that the plate is secure.

b. Restore the carpet to its original position, taking care not to bend the cable.

Technical service bulletin courtesy of ALLDATA.

For additional tech tips, visit www.alldata.com.

You May Also Like

Introduction to the Maverick Tire Changer

Joe Keene speaks with Hunter Engineering service rep Rick Marzen on Hunter’s premium center-clamp Maverick tire changer.

Joe Keene, automotive content video producer at Babcox Media, speaks with Hunter Engineering service rep Rick Marzen on Hunter’s premium center-clamp Maverick tire changer and runs thorough a demonstration of a typical low-profile sidewall procedure. This video is sponsored by Hunter Engineering Co.

U Power Launching Commercial Operation for EV Battery Swapping

Its model for two-wheeled and light four-wheeled EVs is set for a formal commercial rollout in Wuhu, Anhui Province, China.

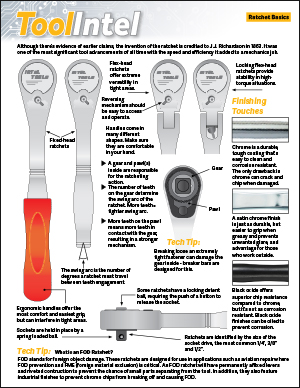
#5 Ratchet Basics

Although there’s evidence of earlier claims, the invention of the ratchet is credited to J.J. Richardson in 1863.

Hyundai Front Windshield Camera Sensor and Blindspot Calibration

Joe Keene discusses the calibration procedure for a Hyundai Santa Cruz that needed a windshield replacement and rear bumper repair.

Snap-on Announces Latest Software Release

The latest software includes new coverage, guided component tests and features.

Other Posts

Elywhere Launches in North America

Elywhere said its chargers can be configured to support power in the 1 MW range, providing solutions for electric fleets.

AACF Launches 65th Anniversary Fundraising Initiative

The campaign aims to raise $65,000 through 1,000 donations of $65 each.

#4 Multimeter Basics

A digital multimeter (DMM), also called a digital volt-ohm meter (DVOM), is a crucial tool for todays technician.

Multimeter Basics featured image
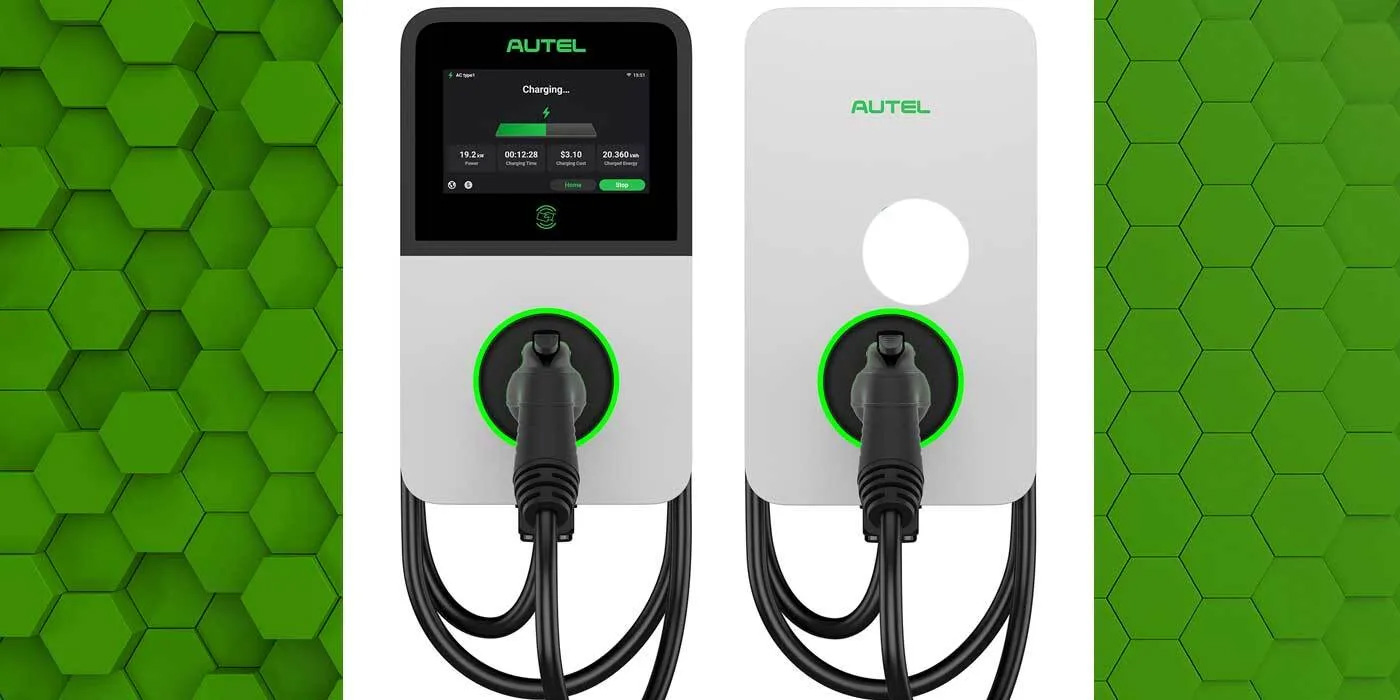
Autel Releases the AC Elite G2 Charging Series 

The charger can be used in various settings, such as public commercial parking areas, residential areas, hospitals and service areas.