 Some 2004-’06 Santa Fe (SM) vehicles may exhibit an overheating engine and inoperative A/C. Inspection of the radiator fan connection finds it is abnormal. A replacement connector is available (E25).
This bulletin provides the procedure to replace the radiator fan motor connector with the replacement connector.
Service Procedure
1. Disconnect the negative battery cable from the battery post.
2. Disconnect the radiator fan connector.
3. Pull away the wiring fixed to the radiator fan shroud.
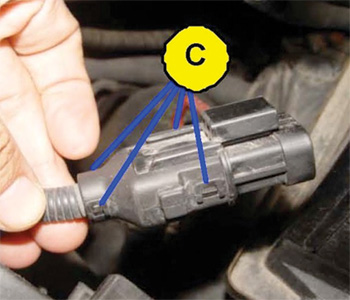
4. Open the fan motor side connector cover by releasing four cover locks.
See Figure 1, c.
5. Remove the connector cover.
6. Using a cutter, vertically cut the corrugated tube 120 mm (4.7”) from the end of the connector.
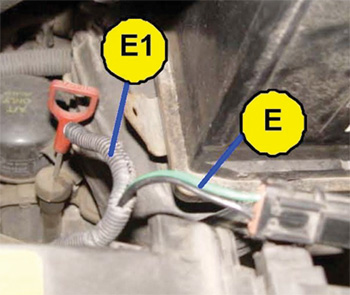
7. Partially remove the cut corrugated tube (E1) from the wire (E).
See Figure 2.
8. Cut off the black wire 30 mm (1.2”) and the green wire 50 mm (2.0”) from the end of the connector. Discard the connector.
9. Strip the wire coverings 8 mm (0.3”) from the cut ends.
Caution: Be careful not to damage the wires.
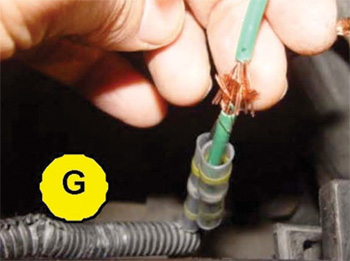 10. Insert the stripped wires into the solder sleeve tubes.
11. Overlap the green wires by squeezing them into each other; do not twist them. Place the solder sleeve tube (G) over the overlapped wires.
See Figure 3.
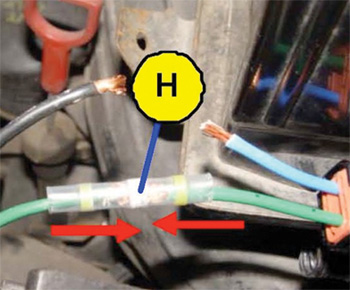
12. Align the solder part (H) of the solder sleeve tube with the center of the overlapped wires.
See Figure 4.
Caution: Make sure to keep the stripped wires overlapped by holding them with both hands.
13. Subject the solder part to heat. Once the solder is melted, evenly heat the entire solder.
14. After the solder part is melted completely, wait approximately 10 seconds until the solder sleeve tube becomes cool.
Pull both ends of the solder sleeve tube outside slightly, then subject both ends of the solder sleeve tube to heat.
15. Apply the above procedures (steps 11 to 14) to the black wire.
 16. Insert the wires of the new fan motor-side connector into the cut corrugated tube, then tape the cut corrugated tube and install the connector cover.
17. Apply the above procedures (steps 4 to 15) to the fan motor harness-side connector.
18. Fix the fan motor-side connector to the fan shroud, then connect it to the fan motor
harness-side connector.
19. Reconnect the battery cable to the negative terminal of the battery
20. With the engine running at idle turn on the A/C or defroster and verify that the cooling fan connection was repaired properly — the cooling fan should come on.
Courtesy of ALLDATA.

