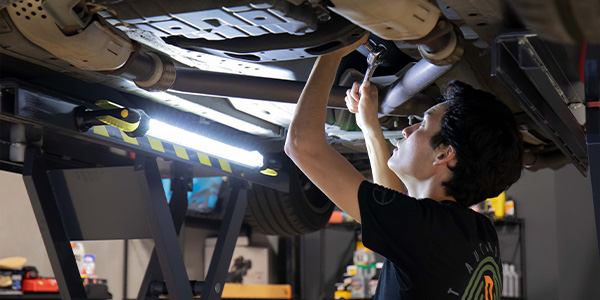
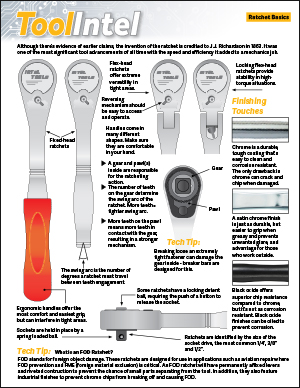
I borrowed a friend’s 2002 Oldsmobile Bravada to pick up some supplies from the local home improvement store. After loading it with weekend-warrior bounty, I started the vehicle and noticed that the rear end was sitting low. The Electronic Controlled Air Suspension (ECAS) compressor was running, but the back end would not return to normal ride height. I found the compressor check valve sticking in the compressor housing, not allowing the compressor to build pressure and raise the rear. Good thing that GM has a ECAS Compressor Service Kit, P/N 15183676, to fix the problem.
Applicable Vehicles:
• 2002 GMC Envoy/Envoy XL (new body style) with electronically controlled air suspension (RPO G67); and
• 2002 Oldsmobile Bravada (new body style).
Repair Procedure:
(Review safety procedures in the ALLDATA system before beginning.)
Important: Do not replace ECAS compressor P/Ns 15094346 or 15745306.
Caution: A sudden release of pressure may cause personal injury or damage to the vehicle. The air suspension system is under pressure until the air supply lines are disconnected. Wear gloves, ear protection, and eye protection. Wrap a clean cloth around the air supply lines.
Important:
• Depressurize the air suspension system only after the rear axle is supported and is set between D- Height and Full Jounce.
• Remove the air suspension system fuse before working on the rear suspension components or the rear axle. Failure to remove the air suspension system fuse could cause the calibration of the air suspension leveling sensor to change and the air suspension system not to function properly.
1. Remove the #1 30-amp ECAS fuse from the UBEC.
2. Lower the spare tire (Envoy XL only).
3. Raise and support the vehicle.
4. Remove the air spring compressor to frame mounting bolts.
5. Disconnect the air inflator switch electrical connections, the air supply lines and the air spring compressor vent hose from the air spring compressor.
6. Remove the air spring compressor from the vehicle.
7. Clean the ECAS cylinder head area with brake cleaner and compressed air.
8. Remove the air compressor valve cylinder head screws (1) using a T25 TORX bit and remove the cylinder head (2).
9. Remove the 0-ring (3), the spring (4) and the check valve (5).
Important: DO NOT allow any foreign material to fall into the compressor head.
10. Clean the old thread locking compound from the aluminum body (6) tapped holes using a M5 x 0.8 thread cleaning tool.
11. Clean any foreign material away from the sealing area.
Important: The new check valve (5) and 0-ring (3) come pre-greased. DO NOT add additional grease.
• The groove in the cylinder head (2) must be installed facing the compressor (6) in order to properly retain the 0-ring.
12. Install the new pre-greased check valve (5), the spring (4), the 0-ring (3), the cylinder head (2) and the screws (1) from the service kit, P/N 15183676. Tighten the cylinder head screws (1) to 5 Nm (44 lb. in.).
Important: Ensure that the color on the air supply lines match the color on the air spring compressor for reassembly. The right side line is clear and the left side line is black. Right and left is also indicated on the compressor.
13. Install the air supply lines with existing fittings to the air spring compressor. Tighten to 2.25 Nm (18.5 lb. in.).
14. Connect the air inflator switch electrical connections, the air supply line and the air spring compressor vent hose to the air spring compressor.
15. Install the air spring compressor to frame mounting bolts. Tighten to 25 Nm (18 lb. ft.). Inspect the rear air springs for proper seating before inflating the rear air springs.
16. Lower the vehicle.
17. Install the spare tire (Envoy XL model).
18. Install the # 1 30-amp ECAS fuse in the UBEC.
19. Start the engine and run for approximately one to three minutes to ensure that the air spring leveling system is functioning properly.
20. Inspect the D height.
21. Inspect for air leaks.
Written by ALLDATA Technical Editor, Eric Seifert.
For additional information, visit www.alldata.com.