No matter how our day is going, as technicians, we are always in a hurry. Much of the time, it’s because of the pressure put on us from the flat-rate system or it might simply be because we have so many cars stacked up that we just need to get the work done.
The result is that we are quite often guilty of rushing a diagnosis. We may get it right from time to time, especially with common issues, but all too often we are pressured to go with the “most likely component to cause the problem,” then we replace the part and it doesn’t fix the problem.
In most cases, we can return a part we’ve tried, but it costs a lot of time for all involved, and we didn’t learn anything nor get any closer to figuring out the problem.
Diagnosis is defined as the identification of a problem by examination of the symptoms, but I’m going to redefine it for the automotive world as “exact identification of a problem through systematic elimination of functional components.” In other words, we eliminate what we know is good to determine what is bad.
The key to a proper diagnosis is approaching it with a plan and the correct mindset. After you have verified the symptom and performed an initial inspection of a vehicle, if the problem is not staring you right in the face, such as wires chewed through by a rodent, it’s time for step two; consult the manufacturer’s service information.
It may seem frustrating at times because it often appears as if the OEMs never tell us how a system works. We find ourselves asking, how does this component work? When does it work? How often does it work?
It’s true, quite often they don’t get straight to it, but most service manuals will have at minimum an overview of how any particular system works, and you’ll find that if you accurately follow the manufacturer’s recommended procedures, you will discover that they have outlined an exact path for you to figure out what is good in order to determine what is bad.
The diagnostic flow chart for any given system is telling you how it works from a standpoint of logic. What data does the computer need to perform a self-check of the system? What data does the computer need to initiate system operation? In what order does the computer need to see this data?
When you begin a diagnosis, read the system overview, the circuit description, conditions for setting the DTC, conditions for clearing the DTC, diagnostic aids and any additional testing tips that the OE may provide. Then, you are ready to perform the procedures provided in a flow chart. Keep in mind that the crucial part of these flowchart procedures is following them to a T.
At some point, the flow chart will call for some type of circuit testing. It’s easy to think “this is a newer car, what I can see of the wiring looks good, I’m sure it’s probably OK,” or just as easy to jump ahead in the flow chart and see what components may possibly cause the problem. Never take this approach because it will come back to haunt you. Until you have completely performed the action in each step of a flow chart and you have conclusive results, you are not ready to move on.
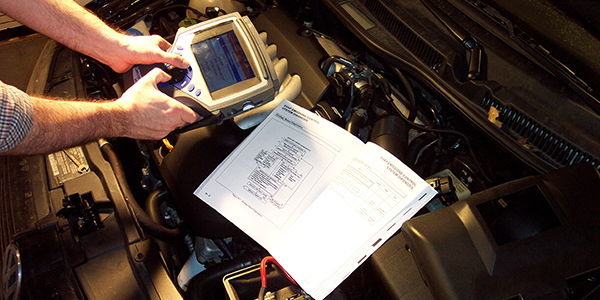
Your scan tool is naturally the starting point as you begin diagnosis, but when you reach a point where you need to perform circuit testing, you will need a good multimeter in addition to some of the most useful tools you can have for these types of diagnostics such as a good selection of test leads, back probes, wire piercers and fused jumper wires.
Keep the mindset that you may have to perform disassembly to access components or wiring harnesses, but it is just part of the job. Work methodically on each of the steps and you’ll be surprised how quickly the correct diagnosis will happen. The more you get into the habit of following flow charts and sticking to a system, the easier it will become, and doing it right the first time always beats trial and error.
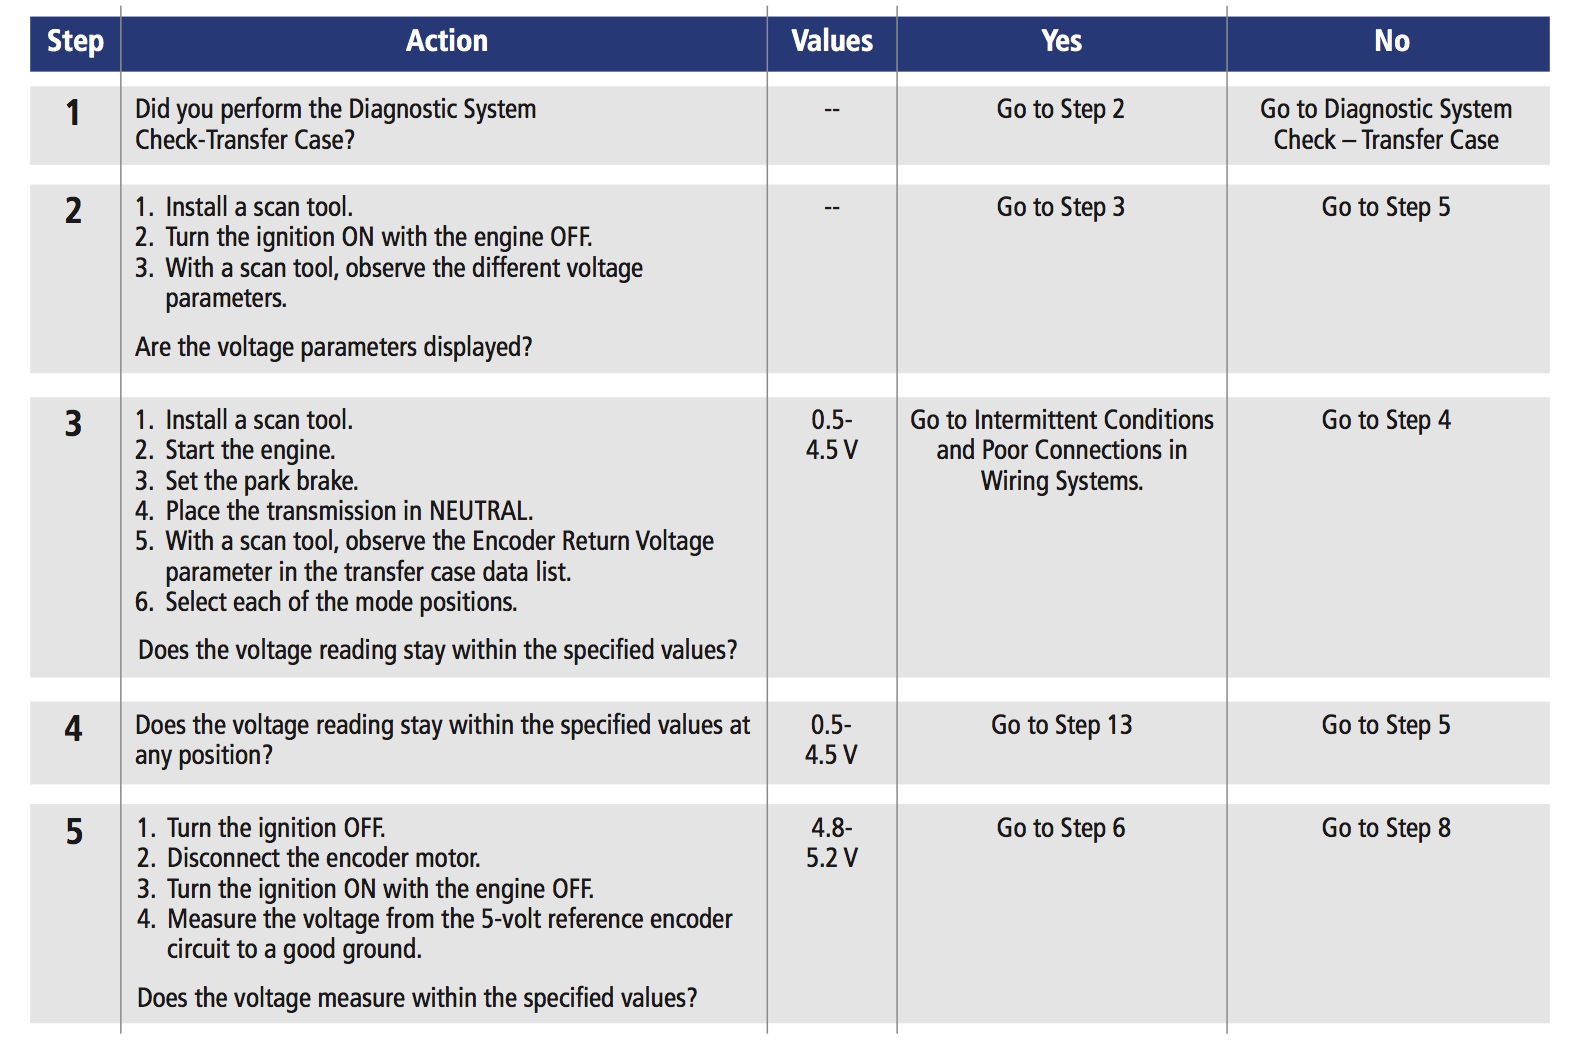
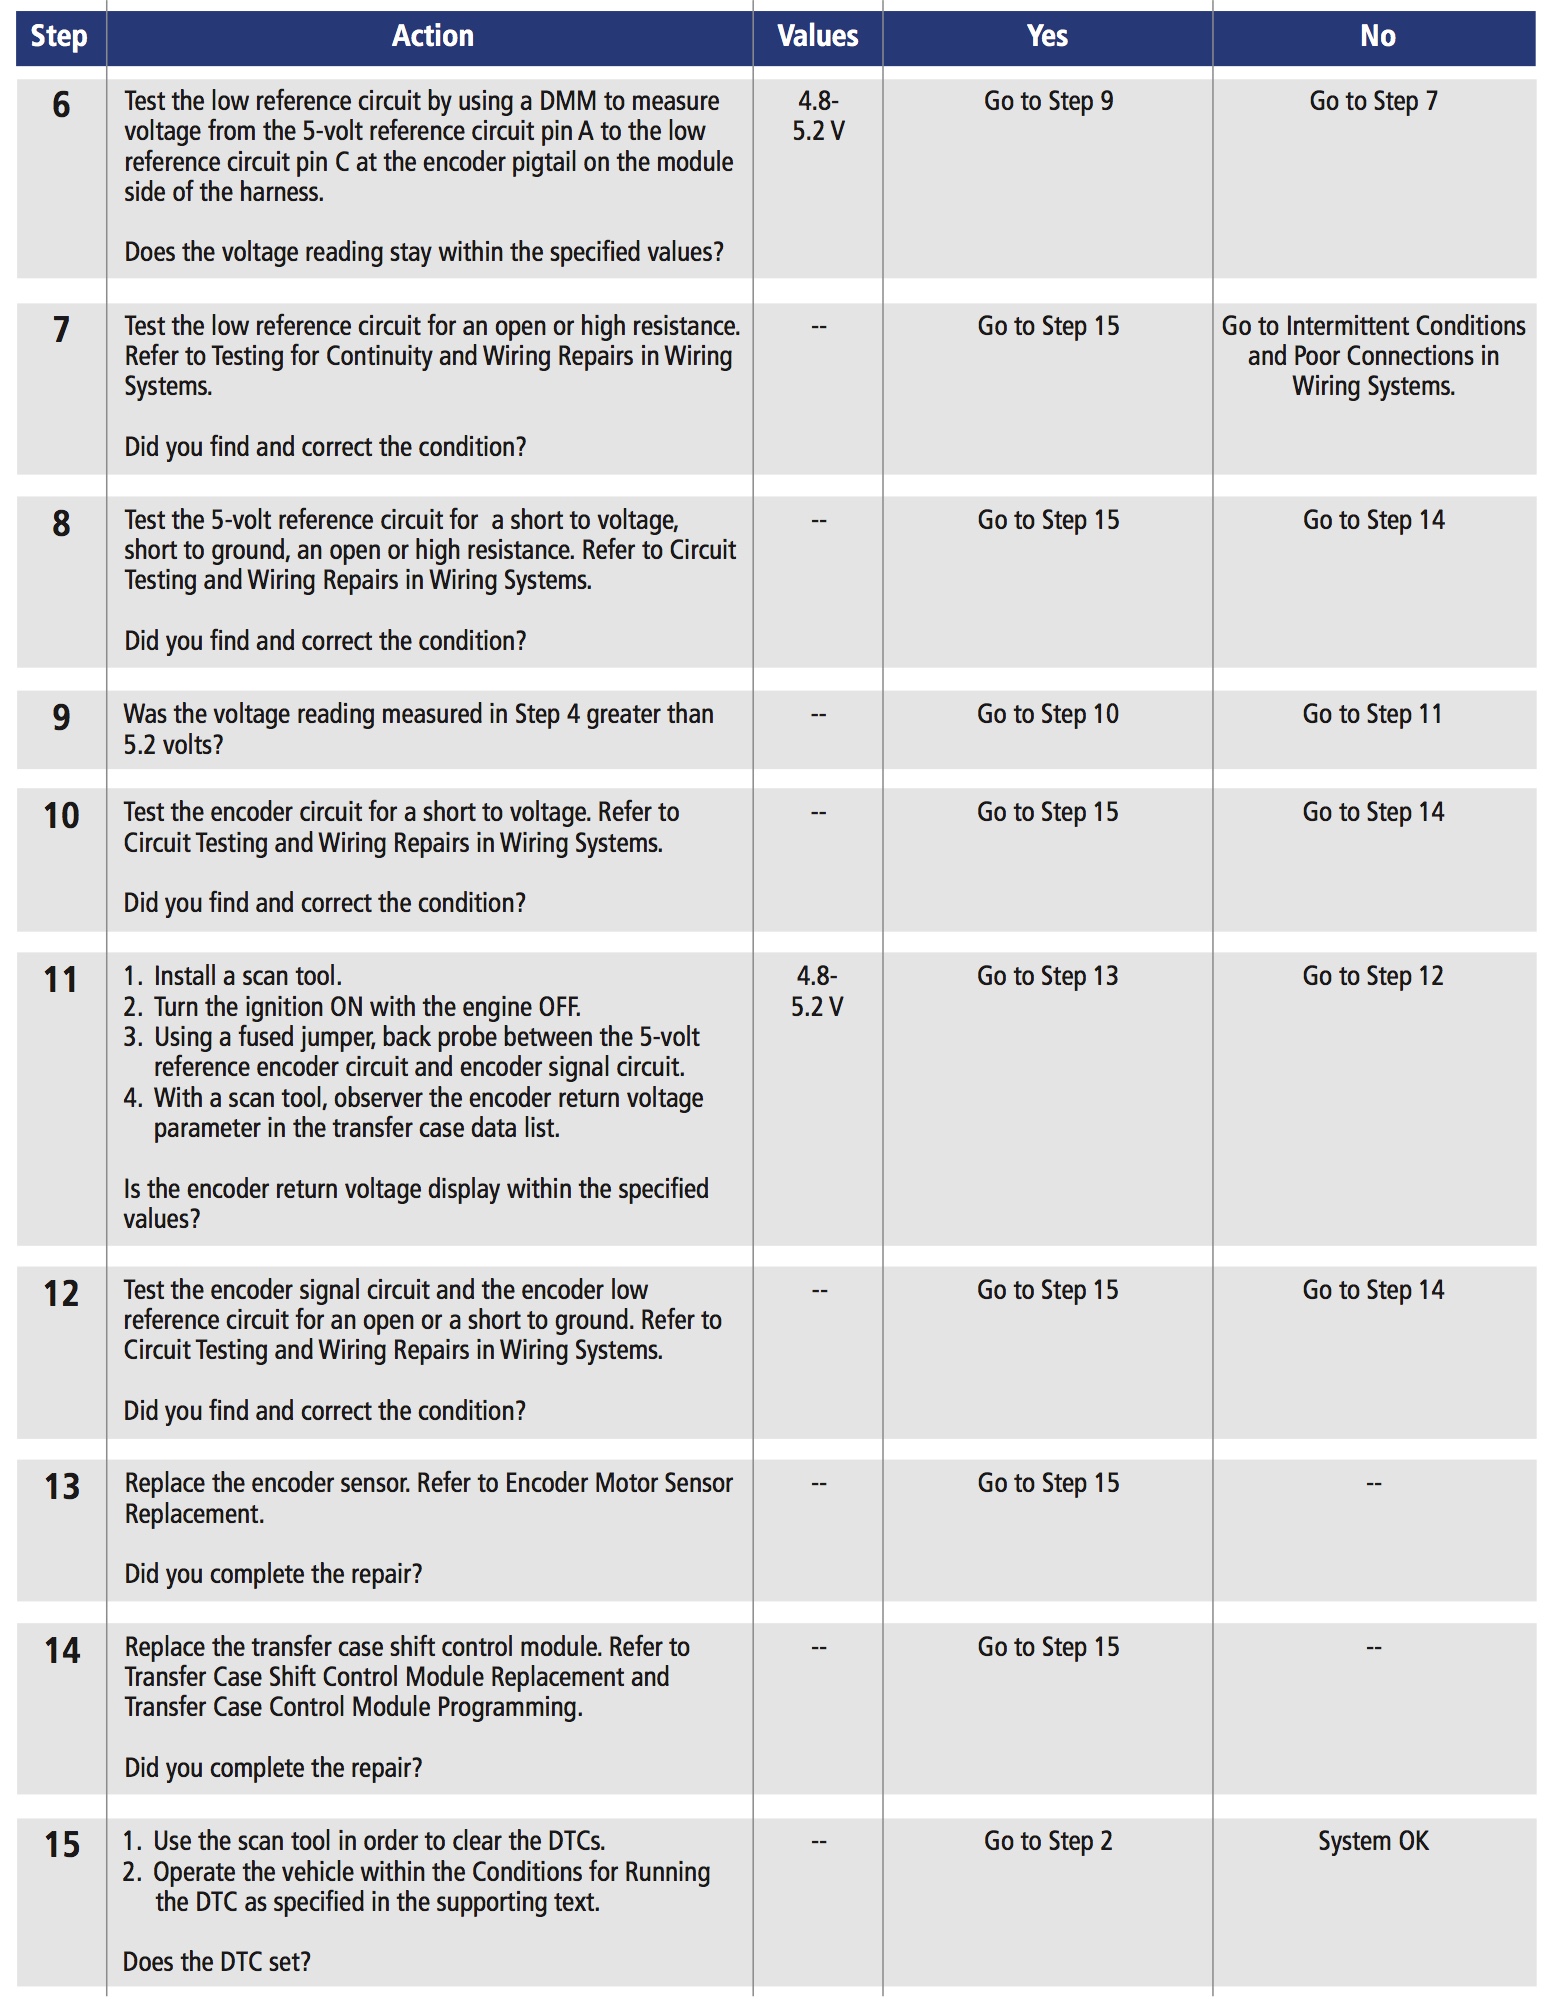
Take a look at the example flow chart for a common 4wd control system. Step one is confirming overall electrical system condition and proper ECU communication and we’ll assume for sake of this article that it is OK.
Step two is observing scan tool data. Depending on the result, you will either view a different data parameter, or move on to circuit testing. You can also see that each step from five through 12 includes electrical testing and requires a multimeter, fused jumper wires and back probes.
By following the flow chart, if you complete each step of this process, you will either solve the problem with a circuit repair or arrive at a conclusive diagnosis and be able to tell the customer with absolute certainty that a component needs to be replaced.
So when you are putting together a plan for diagnosis, confirm the symptom and look up the required procedures. Communicate to the customer or your service advisor how much time it will take you to complete. You have invested in your knowledge and your tools. The time you charge for proper diagnosis is the return on your investment and taking a systematic approach to each diagnostic situation will yield accurate results, proving your skills and gaining the trust of your customers.