We learned our lesson years ago. Before you fix any oil leaks, make sure there isn’t excessive crankcase pressure. Many of the vehicles we work on have crankcase breather systems that are much more involved than a plain PCV valve. A few years back, we looked at the Volvo 850 system, saw how it worked and what happens when it doesn’t. The newer cars with their extended oil change intervals seem to be just as prone to clogged breather assemblies as the older cars, and it’s even more so the case on the turbocharged cars.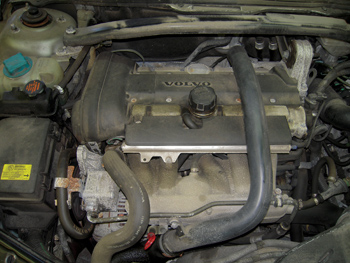
Today, we’ll be looking at a 2004 Volvo XC70 that we purchased from one of our customers. The car has high mileage, 198,123 miles to be exact, but was maintained reasonably well, so I thought nothing of giving her twice what the dealer offered on trade. It was a great deal for both of us. It had a few small oil leaks and it looked like the oil trap was leaking, so I planned on removing the intake manifold and replacing all the breather components as soon as I took over the title.
I was amazed at just how bad it was. The passage into the block that goes down into the oil pan was completely plugged, making it necessary to remove the oil pan to properly clean all the passages. If we were working on a customer’s car, we would have warned them before starting to change the oil trap that, in some instances, the passage in the oil pan can be plugged and the oil pan may also need to be removed. So let’s get started. 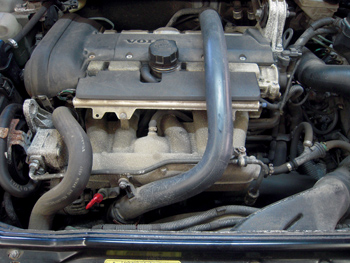
Replacing the Oil Trap:
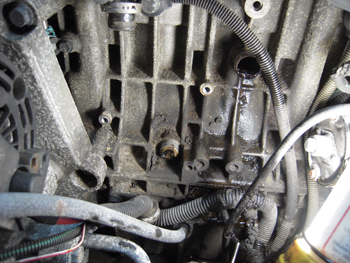
1. Photo 1 provides a glimpse of the engine before we got started. Remember to wait 15 minutes after shutting off the car before you disconnect the battery.
2. Remove the bolts holding the power steering line to the intake, as well as the dipstick tube, turbo duct and vacuum lines. See Photo 2.
3. The fuel rail can stay in the intake; just disconnect the one fuel line going to the rail. We also put a rag in the turbo duct so nothing would fall in. See Photo 3.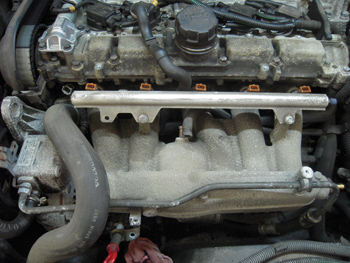
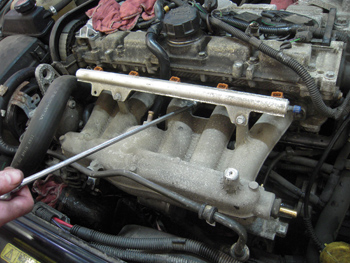
4. Removing the fitting on the bottom of the intake can be challenging (see Photo 4). You don’t have to remove the power steering pump or alternator. Just loosen the intake bolts and you should be able to move the intake enough to remove the banjo bolt that holds it on.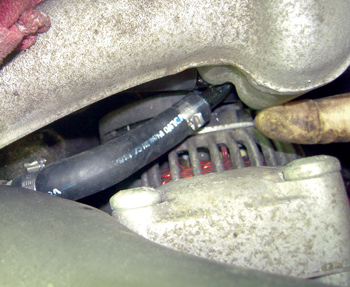
5. Photo 5 shows the electronic throttle body cable. It goes behind the starter so leave it attached and just set the intake off to the side.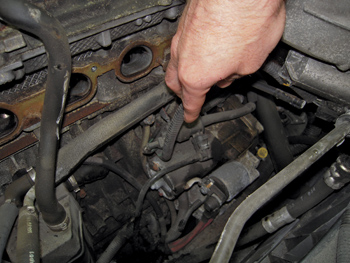
6. Here is the oil trap and hoses ready to come out (see Photo 6). The fitting that went into the bottom of the intake was completely plugged.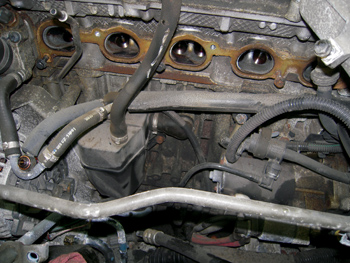
7. The long hose that goes from the oil trap around to the turbo duct has a coolant passage and is trapped behind the bracket that the upper torque mount is attached to (see Photo 7). Once the bracket and mount are removed, you can finish removing the hose.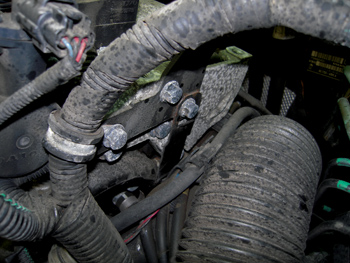
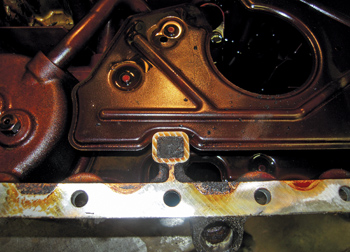
8. We finally have the oil trap box and hoses off, and we can see that the lower passage in the oil trap and the passage into the block are completely plugged. See Photos 8 and 9.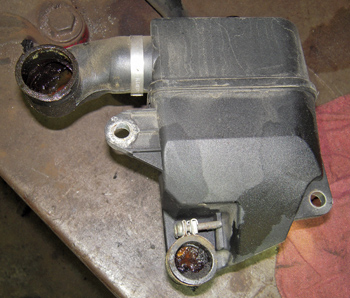
9. Usually we can clean out the passage going into the block, but this one was plugged solid all the way down into the oil pan, and the only way to properly clean it out was to remove the oil pan.
10. The oil pan is fairly easy to remove. Remove the oil cooler (see Photo 10) and the 30 bolts that hold the oil pan to the block. The pan will come off without jacking up the engine or moving the sub-frame.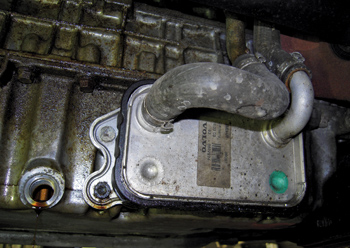
11. Once the oil pan was off, we could see just how badly the return passage was plugged in the block (see Photo 11) and how badly the oil pan was plugged (see Photo 12).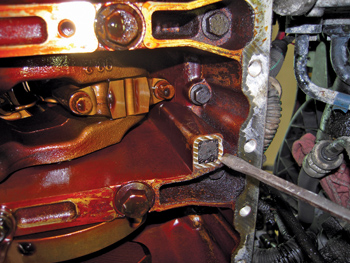
12. Be sure to clean the oil passage in the pan from top to bottom before getting the oil pan ready for reinstallation.
13. Photo 13 shows the oil pan clean and ready for reinstallation. Be sure to replace the
O-rings for the oil pipe in the oil pan. They can get hard and crack and cause a loss of oil pressure. 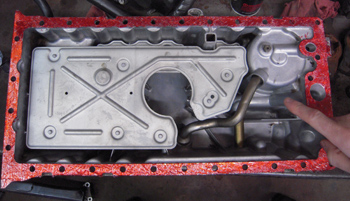 Volvo’s oil pan seal kit P/N 30750783 includes all the seals needed to do the job. The only parts that don’t come with seal kit are for the oil cooler (see Photo 14).
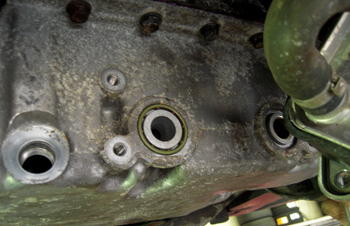
14. Photo 15 shows how the oil trap and hoses will look when they are all put together and Photo 16 illustrates how it all looks installed on the engine.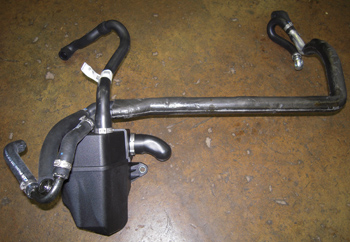

15. With the high mileage on this car, we replaced all the oil trap-related hoses and clamps (Nothing fits better than the factory OE parts and that includes the pinch clamps). It’s too much work to have to replace any of the parts at a later time. The engine number on the timing cover will ensure that you get the right parts for the car you’re working on.
16. The intake goes back on along with the vacuum hoses, fuel line and turbo duct. Plug in your injectors. Finish the oil change, top up the coolant and you’re ready to go (see Photo 17).
 I think when cars start to reach higher mileage, customers tend to neglect some of the regular service and extending oil change intervals certainly contributes to these oil-related problems.
Volvo recommends oil changes every 7,500 miles, and if you follow this recommendation there shouldn’t be any problems. It’s when the customer is “too busy“ and they routinely extend the oil changes past the recommendation that we see these types of problems. That’s why it’s important that we educate our customers and stress the importance of regular maintenance.