These tips outline the belt replacement for the popular 2.2- and 2.3-liter Accord engines. The other Honda engines are similar, but don’t require the balance belt. They shouldn’t present any challenge to the experienced tech, but there are some things to keep in mind as you tackle these jobs.
The 3.0-liter V6 models use a hydraulic tensioner that has to be mechanically reset and require a special tool to hold the tensioner in place while it’s installed. The tool is necessary, but it is inexpensive.
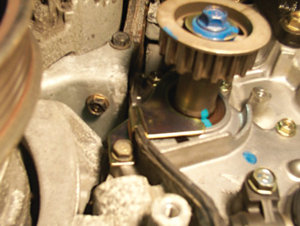
This engine uses a double-tensioner system where both the balance shaft and timing belt tensioner are mounted on the same stud. Before you loosen the adjustment nut that will relieve the tension off both belts, install and tighten a short 6 mm bolt in the adjustment slot (the dipstick tube bolt works well) to maintain tension on the timing belt while you remove the balance belt. With the balance belt out of the way, loosen the just-installed bolt. Move the tensioner to release tension and snug the bolt. With the belt removed, check or replace the seals and water pump and install a seal retainer.
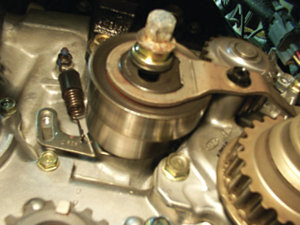
Installing a retainer plate holds the balance shaft seal in place. The 2.2-liter engine used in the Accord had a balance shaft seal with a tendency to come out of its bore, resulting in a severe oil leak. The affected models were recalled and a retainer plate was installed to hold the seal in place. This simple fix was quite effective and the problem seems to have been solved.
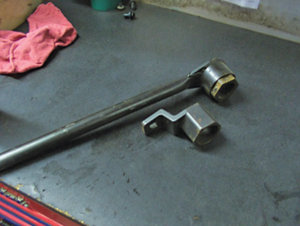
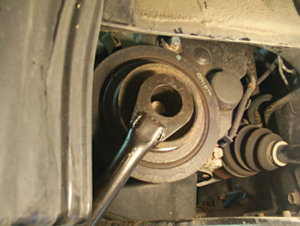
You will need to remove the crankshaft bolt and pulley. This can be the most challenging part of the job since the bolt is usually too tight (181 ft.-lbs.) to be removed with a conventional impact gun. Use a special tool that fits inside the hex on the crankshaft damper and a long breaker bar to remove this bolt. In extreme cases, it may be necessary to heat the bolt. Do so with caution so as not to damage the crank pulley or surrounding parts.
Turn the engine over in the direction of rotation (counterclockwise) for
six crankshaft revolutions. Confirm that the marks are aligned and that the belt is taut between the crank and cam. Loosen the tensioner adjustment nut to allow the spring to make its final adjustment. Retighten the temporary 6 mm bolt so tension will be maintained while installing the balance belt.
The balance belt installation is more of the same. Loosen the tensioner adjustment nut to allow the tensioner pulley to be moved out of the way. Install the belt using your marks or the alignment pin. Loosen the adjuster to allow the tensioner to work, rotate the crank
one turn and tighten the adjustment nut. Don’t forget to remove the temporary 6 mm bolt. Reinstall the belt covers, drive belts and pulleys. Lightly lubricate the threads and contact surface of the crank bolt and torque it to 180 ft.-lbs.
Look closely at the crank damper and pulley for separation. There have been instances of these pulleys coming apart. If you think you hear a loose belt, yet all of the belts are tight, or if the timing marks didn’t line up on the pulley when the engine was at TDC, suspect slippage between the pulley and hub of the damper.


