The toughest part about changing a timing belt on most engines is just getting to the belt. The timing belt is sealed inside a protective cover on the front of the engine. Replacing it typically requires removing everything on the front of the engine that obstructs the timing cover. This includes the serpentine belt and/or V-belts, idler and tensioner pulleys, often the crankshaft pulley, and removing or repositioning any belt-driven accessories such as the water pump, alternator, A/C compressor and/or power steering pump that may be in the way.
 With transverse (sideways)-mounted engines, changing the timing belt can be an even more labor-intensive job because there’s little elbow room between the front of the engine and the left inner fender panel. On some of these applications, the flat rate to change the belt may be six to eight hours! On most, the engine has to be supported so the left motor mount can be removed to remove the timing cover.
What kind of special tools do you typically need to change a timing belt? It depends on the application, but generally you need the following:
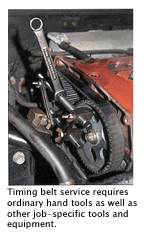
Ordinary hand tools to remove the timing cover, brackets and engine-mounted accessories.
A serpentine belt removal tool to loosen the automatic belt tensioner — this is a must on tight-fitting transverse-mounted engines.
A floor jack, engine puller or engine support bar to support a transverse-mounted engine if the motor mount must be removed.
A belt tension gauge may be required on some applications to set the tension on the timing belt.
A torque wrench for tightening critical fasteners (the belt tensioner, idler pulleys, camshaft pulley bolts and/or crankshaft pulley bolt).
A universal gear puller or special OEM crankshaft pulley removal tool if pulling the crank pulley is necessary to replace the belt.
Special camshaft positioning tools (or a bolt or pins) may be required on some dual overhead cam engines to hold the cams in place while the belt is replaced (see the OEM tool list that follows).
A special timing belt tensioner adjusting tool may be required on some engines (again, see the OEM tool list that follows) to set belt tension.
A timing belt replacement manual or the OEM service literature to look up the positioning of the timing marks and the belt replacement procedure. The replacement procedure for some belts is not obvious and requires following a step-by-step procedure so that everything is installed correctly and lines up. Considering how much labor is required to replace some timing belts, it’s not a job you want to do over.
Special OEM Timing Belt Tools
The following is a sample of some of the special OEM tools that may be required to replace a timing belt. In many instances, you can use a universal gear puller in place of the factory crank pulley puller, or substitute another tool for the recommended factory tool, but it’s always easier with the OEM tool or an equivalent aftermarket tool that has been designed for the same purpose. For cam positioning tools, you may even be able to fabricate your own tool using the OEM tool as a guide. Audi 2.8L V6 (1992-’94) — Requires camshaft holding tool 3243 and crankshaft holding tool 3242. Chevrolet 3.4L V6 DOHC (1991-’94) — Requires two camshaft timing
clamps J38613-A.
Chrysler 2.0L OHC — Requires tensioner tool MD998752 and tensioner adjuster tool MD998738. The tensioner adjuster tool threads into a hole under a rubber plug in the engine mount bracket. Here’s the factory procedure for adjusting the belt on this engine:
Loosen the tensioner pulley bolt.
Using tool MD998752 and a torque wrench, turn the pulley clockwise with 22-24 in.-lbs., hold the pulley and torque the tensioner bolt to 31-40 ft.-lbs.
Remove the rubber plug from the engine mount bracket and screw in tool MD998738 until it moves in the automatic tensioner pushrod.
Remove the 0.055” rod from the tensioner body.
Remove tool MD998738, turn crankshaft clockwise two revolutions and wait 15 minutes.
Measure the pushrod protrusion. It should be 0.15” to 0.18”.
If it is not, repeat the tensioning procedure.
Chrysler/Dodge/Plymouth 2.2L and 2.5L (1981-’95) — Requires tensioner wrench C-4703.
Ford Escort 1.9L (1985-’91) — Requires crankshaft pulley wrench D85L-6000-A and camshaft holding tool D81P-6256-A.
Ford Taurus SHO 3.2L V6 DOHC (1992-’94) — Requires tensioner tool T93P-6254-B and torque wrench adapter T93P-6254-A.
Honda Accord 2.2L (1990-’94), Prelude 2.2L V-TEC (1993-’96) and 2.3L (1992-’94) — Requires the following for balancer shaft belt installation: locating pin 07LAG-PT20100 (or a M6x100 mm bolt). Honda Prelude 2.0L and 2.1L (1988-’91) — Requires two 5 mm pin punches to hold dual overhead cams at TDC.
Hyundai Sonata 2.0L and Elantra 1.8L and 1.6L — Requires tensioner pulley socket wrench 09244-28100 and tensioner adjusting screw 09244-28000.
Isuzu 1.5L (1985-’93) — Requires belt tension gauge J326468-B and crankshaft wrench J37376.
Lexus ES250 2.5L — Requires crank pulley holding tool 09213-70010, pulley tool handle 09330-00021 and puller 09213-60017.
Lexus SC400 and LS400 4.0L V8 — Requires crank pulley holding tool 09213-70010, pulley tool handle 09330-00021 and puller 09213-31021.
Mazda Pickup 2.3L — Requires tensioner adjusting tool 49-UN10-067.
Mitsubishi 3.0L V6 DOHC Diamante and 3000GT (1993-’95) — Requires tensioner tool MD998752-01.
Mitsubishi 2.4L Eclipse and Montero 3.5L V6 DOHC — Requires tensioner tool MD998767.
Mitsubishi 2.0L Eclipse and Galant (1988-’94) — Requires tensioner pulley tool MD998752 and tensioner tool MD998738.
Nissan 3.0L V6 (300ZX) — Requires tensioner tool EG 14860000.
Toyota 3.4L (4Runner) and RAV4 2.0L — Requires crank pulley puller 09950-50010.
Toyota 3.0L V6 4Runner (1993-’95) and Camry (1993-’96) — Requires crank pulley puller 09213-31021.
Volkswagen 2.0L Golf, Jetta and Passat (1990-’94) — Requires tension gauge VAG 210 and two-pin wrench – Matra 159.


