 Your customer’s Volvo has an oil leak. You think you do everything right. You add dye and see the rear main oil seal leaking. The repair goes smoothly, the customer is happy…for about two weeks. Then the rear main oil seal is leaking again, and he wants to know why.
This is not an isolated case. Saab has released several TSBs on upgrading its crankcase ventilation system. It was inadequate and the excess pressure caused oil leaks. VW and Audi recommend replacing the suction pump on some of its cars before leaks are repaired. Again, excess crankcase pressure can cause leaks. Repair an oil leak without eliminating the pressure, and the leak will surely return. We learned the hard way.
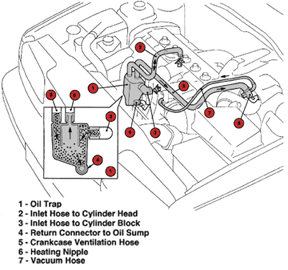
 In the hope of saving you from the same aggravation, I’ll discuss some of the symptoms of a clogged oil trap; how to test crankcase pressure; and, if it’s necessary, the steps involved in replacing the oil trap and related hoses. The older Volvo 240 and 740 models and the newer s70 and s80 models had similar setups to the 850 model that I’ll be discussing in this article.
Finding the Problem
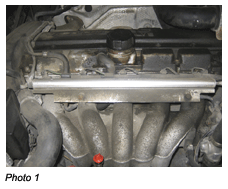
A customer’s 850 turbo comes in and it looks like oil is leaking from just about everywhere, or the dipstick is popped out (see Photo 1). Both are signs of a severely plugged oil trap. If you’re doing 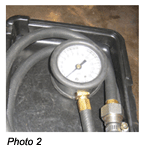 routine maintenance and, while cleaning the throttle housing, you notice oil in the housing, there is a good chance the oil trap is plugged. This is one of the reasons for all the electronic throttle housing failures on 1999 and later Volvos. We’ve also seen uneven idles and check engine lights with fuel trim codes stored, caused by plugged crankcase ventilation systems. Other cars with minor oil leaks may have partially clogged breather assemblies and are much more difficult to diagnose.
 Volvo has a couple of TSBs on diagnosing and cleaning some of the crankcase ventilation systems on newer s60, s70 and s80 cars. Its special tool, P/N 9997226, is attached to the dipstick tube and at idle they want to see -0.2 KPA or less. We use an exhaust backpressure gauge with a hose attached to measure crankcase pressure (see Photo 2 on page 18). On a good car, even when raising the idle, the gauge won’t move above 0 psi. Plugged boxes are easy to see. We’ve seen more than 4 psi on some cars, and a psi of
  0.5 on others. Remember that even if we see no pressure, the box can be partially plugged and should be replaced. If the car has 100,000 miles on the odometer, the oil trap should be serviced. Ignoring the problem can lead to a plugged passage leading into the oil pan, which requires oil pan removal.
Replacing the Oil Trap
So, we’ve determined that before any oil seals are replaced, we need to check and replace the oil trap. Let’s get started.
Note: Always disconnect the negative battery terminal before starting any major repair.
The oil trap is located under the intake manifold, so the intake needs to be removed. Photo 1 also shows the intake oil leaks around the top of the engine.
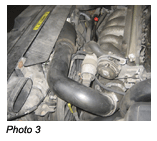
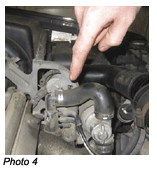
Disconnect the throttle cable (see Photo 3) and the hoses from the vacuum tree (see Photo 4) and intake housing. There were five vacuum hoses on our turbo model.
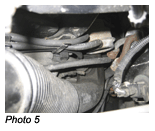
Remove the lower hose from the IAC valve, then remove the turbo intercooler to throttle 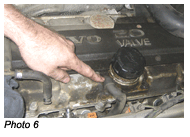 housing tube. Be sure to check and clean all the vacuum ports on the tree and at the other ends of the hoses where they go into the turbo duct by the turbo (see Photo 5). The hoses will also become clogged over time.
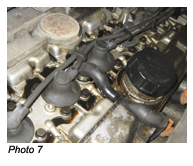
The spark plug cover must be removed to access the hose that comes from the oil trap (see Photo 6). Oil all over the cam cover is a good indication that the oil fill cap gasket is leaking. This is also an indicator that the oil trap is plugged (see Photo 7).
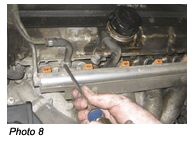
On this model, the fuel rail does not have to be removed. Just relieve the pressure on the system and disconnect the feed and return lines. Unplug the injectors and be sure not to lose the plug gaskets (see Photo 8).
While not necessary on some models, it’s easy to remove the cooling fan assembly, which gives you a lot more room to work.
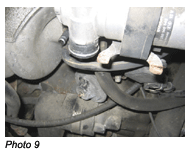
If equipped, the EGR tube and EGR temperature sensor will need to be disconnected. Also, disconnect the throttle position sensor (see Photo 9).
Remove the upper intake bolts and loosen the lower intake bolts. The bottom bolt holes are slotted, so the bolts do not have to be removed. This makes assembly much easier.
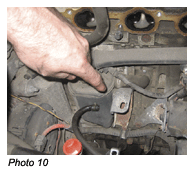
There is also a bracket under the intake that will need to be removed before the oil trap can be removed (see Photo 10).
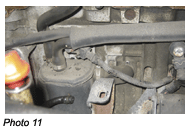
We are now ready to remove the two bolts that hold the oil trap to the block (see Photo 11).
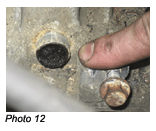
Disconnect the hoses and remove the oil trap. This one wasn’t the worst, but it was bad enough. The lower port was plugged only halfway. This is the passage that goes down into the oil pan (see Photo 12).
If it’s plugged, the oil pan should be removed to properly clean the passage.
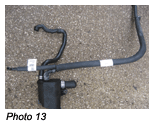
Our car had 160,000 miles on it, and all the hoses were very hard and brittle. We replaced the oil trap and all the hoses and clamps going to it (see Photo 13). There’s nothing worse than having to go in and replace them later.
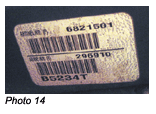
You will need the engine serial number to order the correct parts. The serial number is located on the timing cover (see Photo 14).
Clean the passages in the block, being careful not to push any debris into the engine block.
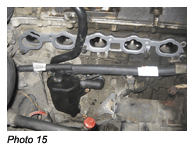
Once the oil trap and related hoses are in place, the intake manifold can be replaced. Photo 15 shows the lower intake bolts holding the gasket in place to ease installation.
Reconnect the EGR tube and temperature sensor. Install the cooling fan and reconnect the fuel rail.
Once everything is back together, I recommend degreasing the engine and adding dye to check for any persistent gasket or seal leaks, which you can then repair.
 |
 |
 |
 |
The total cost for parts for this repair was about $150. Labor for the 850 and s70 models is between three and four hours, depending on whether it’s a turbo or not. The s80s are four to five hours depending on whether it’s a turbo or not. Not having to warranty leaking oil seals and gaskets? Priceless — for you and your customer.


