 Thanks to all the potholes caused by our harsh winter weather, we tend to do a lot of alignments here in Northeast Ohio. But wherever you live, it’s a good idea to check the alignment whenever you put on a new set of tires or replace a worn suspension component. And, sometimes you might encounter a problem due to a unique chassis setup.
Take the Volvo 850, S70 and V70, for example, which from 1993 to 2000 had a slightly different split rear axle setup that was adjustable. There are adjusting blocks bolted to the ends of the axle halves that slide into and are secured to the other side of the rear axle (see Illustration 1).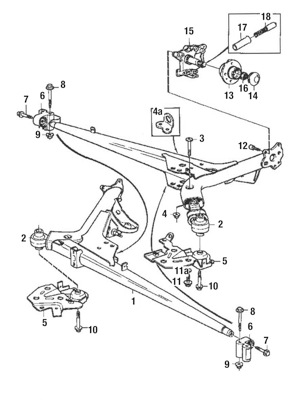
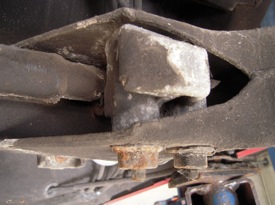
When trying to do an alignment on these models, a common problem is frozen or broken rear axle alignment blocks (see Photo 1). If they are broken or frozen, the blocks will need to be replaced before an alignment can be done. If you’ve never done this job before, it can be a little tricky.
When a 1998 S70 came into our shop with some rear suspension noise, a quick check revealed that the right-side alignment block was broken (see Photo 2). This real-world scenario serves as 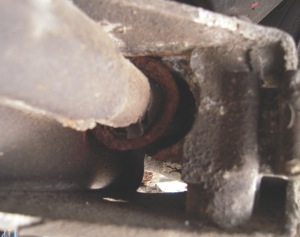 a perfect opportunity to share some insight on making the job a little easier. We normally begin by doing the blocks on both sides, which enables us to then do a full 4-wheel alignment. Keep in mind that if you are buying an OE block from Volvo, you will need to buy all the hardware separately (see Photo 3). We use a kit that comes with all new hardware. Let’s get started.
1. Put the car on the lift and remove the rear wheels.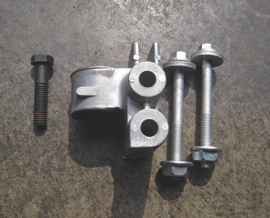
2. Remove the rear sway bar, which is held in only by two bolts on each side. In this part of the country it’s usually necessary to heat the nuts and bolts to get them loose (see Photos 4, 5 and 6). We like to use an inductive heater instead of torches, especially around the fuel tank. 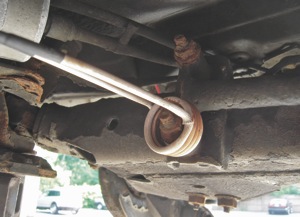
3. Once the bolts are removed, it’s necessary to slide the sway bar all the way toward the driver’s side in order to get it out (see Photos 7 and 8). The driver’s-side axle block is the easy  side. After removing the two adjusting bolts, the axle can be pulled back and the end bolt removed without much trouble. If the right-side axle block is broken, you may be able to pull
 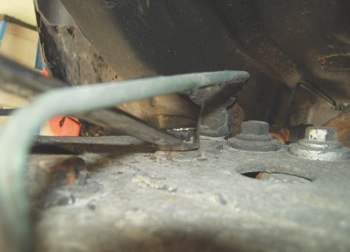 the pieces out and then remove the end bolt. If it’s not broken, the end bolt can be accessed through the opening at the outside of the axle.
4. Once the two blocks are removed, you can put the new blocks in. Always put the right side 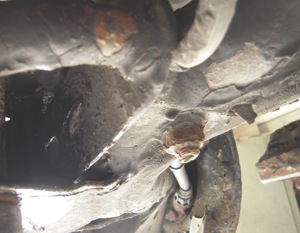 in first to make the job easier. Pull the end of the axle out and toward the rear of the car and put the new block in place.
5. You will then need to start the end bolt through the access hole, which can be a little tricky (see Photo 9). You can torque the end bolt, but don’t put the two adjusting bolts in until the 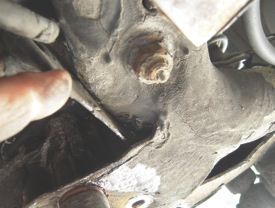 left-side block is in place. The left side is relatively easy. With the end of the axle pulled out toward the back of the car, the block can be bolted to the end of the axle and then slid back into place (see Photo 10).
6. Once both blocks are in place, install and snug the adjustment bolts (see Photo 11). They will get torqued during the alignment process. 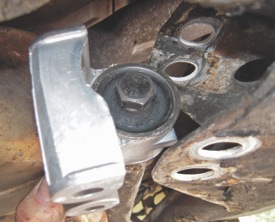
7. Reinstall the sway bar, torque the wheels and the car will now be ready for an alignment.
It’s important to remember that a proper alignment can’t be done if there are frozen or worn steering or suspension components. Be sure to inform any customer or potential customer that before any alignment can be done, you will first give the vehicle a thorough evaluation, and then subsequently inform them what repairs are necessary before the alignment can be started. That way, the unsuspecting customer won’t be surprised when you call to tell them about a worn tie rod, bad ball joint or broken axle block. You will be servicing the customer well and increasing 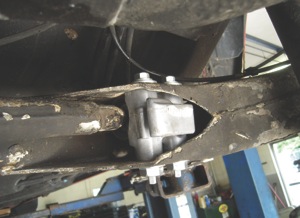 your bottom line by finding that extra, but necessary, work.


