 Some of the toughest challenges we face as import specialist techs are noise complaints. And, in order to make an accurate assessment, we take the time to ask our customers questions like: Is the noise present when the car’s stationary or moving? Does it change around corners or under different load considerations? Is it a growl, squeak, groan or rattle?
While wheel bearing noise is also one of the toughest problems for the customer to describe, it’s not unusual for it to come on so gradually that the customer may not even notice it until you mention it after an unrelated road test. Many times, the customer complaint will send you down the wrong path if you let it. We’ve heard complaints from exhaust leaks, to tire balance, to “it just doesn’t sound right,” that have ended up being bad wheel bearings.
When faced with any noise complaint, take the time to test-drive the car with the customer, if that’s possible.
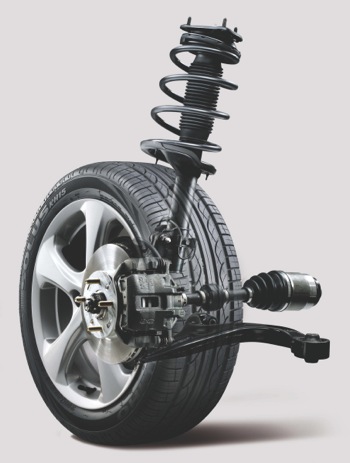
When the vehicle is up in the air and you confirm the wheel bearing problem, be sure to look at the whole job and include peripheral items in the estimate. On many models, it will be necessary to disconnect sway bar links. Does it look like they will come apart and go back together? It might make more sense to replace them. If the CV boot is torn, this is the best time to take care of it.
IMPORTANT FIRST STEPS
During your test-drive, make note of the sound as the load changes around corners; it will give you an idea of which bearing has failed (the noise will usually increase with load). If there’s no change, it’s an indication there may be another problem disguising itself as a wheel bearing.
Anything that can feed a vibration into the chassis could be the problem, from worn engine mounts to mis-routed A/C lines or, in the case of SUVs, don’t discount the rear differential and driveshaft as a source. If any doubt exists, our final step of the diagnostic process includes putting the vehicle on the lift and pinpointing the problem with a stethoscope.
We’ll take a look at the recommended procedure for bearing replacement on the popular 2010 Elantra, as outlined on the Hyundai service information website, www.hmaservice.com.
Like many jobs, the equipment resources in your shop will dictate the procedure. While the service information outlines the procedure using a shop press, the tool manufacturers offer some excellent tools that claim to make the job easier and more efficient.
In the case of the Elantra, it’s a straightforward situation to remove the bearing carrier, making working on a bench a good option. As always, follow good work habits, such as opening the brake bleeder before pushing back the pistons to remove the caliper, rather than pushing dirty fluid through the ABS controller. If you’re not changing the pads, a folded-up piece of cardboard between the pads will hold them in place and protect them.
Be careful with the protective boots on the ball joints and tie rod ends, as well as with the threads. You also have to be careful with the ABS sensors. If they’re stuck in the housing, it may be a better strategy to leave them in place and unplug them from the harness, and be careful with them as you work on the bench. I like to tell my techs to think about putting the job back together as they’re taking it apart. It’s easier to clean up the threads on a tie rod end before it’s removed from its taper, than it is later; a couple of extra minutes during disassembly can pay dividends in the end.
REPLACEMENT STEPS
1. With the bearing carrier on the bench, the first step is to remove the hub from the bearing. Whether you use a press or hub tool to accomplish this step, you’ll likely end up with the outer inner bearing race on the hub.
a. All the factory information suggests removing the race with a puller but, in practice, we know how difficult it can be to get the puller ears or bearing plate in the space provided, if any is provided at all. You can use a sharp chisel in an attempt to wedge the race over and, more than likely, you’ll be spending some time cleaning up the burrs.
b. Another method is to use an air chisel against the bearing surface of the race with the hub held firmly in a vice, and drive the race away from the hub, allowing for removal. As always, wear proper eye and hand protection, and be aware of any bystanders when chiseling.
2. Removing the bearing from the carrier is not an issue; remove the snap ring and press or withdraw the old bearing. Be careful removing the snap ring. It’s not usually included with the bearing and trying to force it with snap ring pliers could leave you with 80% of the ring in the housing and no way to compress it for removal.
If you don’t see the whole ring come loose in the housing when using the pliers, take some time with a small chisel and/or punch to loosen the ring in the groove. It won’t take long; certainly less time than it takes to remove the broken ring and get one from the dealer.
3. Before you start the reassembly process, inspect and clean the parts. Look at the hub to be sure there isn’t a “step” on the shaft where the bearing rides. And, if you haven’t already done it, clean up the bearing bore in the housing, paying particular attention to the snap ring area where rust tends to build up.
4. When assembling, give your tools a break and apply a light coat of lubricant to the OD of the bearing and the housing before installing the bearing and snap ring.
5. Before installing the hub, be sure to install any shields that are behind the hub. We are warned not to press on the outboard inner bearing (that doesn’t change) as the race has to be supported as the hub is installed; this is where the hub tools excel in the adapters provided. We find it easiest to have the hub on the press table and press the bearing carrier onto the hub, making sure the races are fully seated.
6. Reinstalling the knuckle will present no problems. Clean and lube the splines on the axle and hub, remembering that the outer CV joint spline being fully seated is what holds the bearing together. If there is a convex washer under the axle nut, it should be assembled with the convex surface outward (inside of washer higher). As the final step in the bearing replacement job, torque the axle nut to the recommended level. It has a wide span of 148-192 ft.-lbs., but it will let you get a better feel that the bearing and hub are properly seated, rather than running it down with the impact gun.
You’ll find a bearing and hub assembly on the rear of the Elantra. Again, there should be no surprises on the nuts and bolts of this job, but be careful when estimating the job. Rear bearing and hub assemblies usually require less labor than the front, where the hub has to be separated.
The factory info has us removing the rear carrier on the Elantra to gain access to the bearing retainer bolts, increasing the time required. Again, good work habits pay dividends. Take the time to clean the parts to ensure that the bearing assembly is fully seated in the knuckle when you torque the bolts that retain it.


