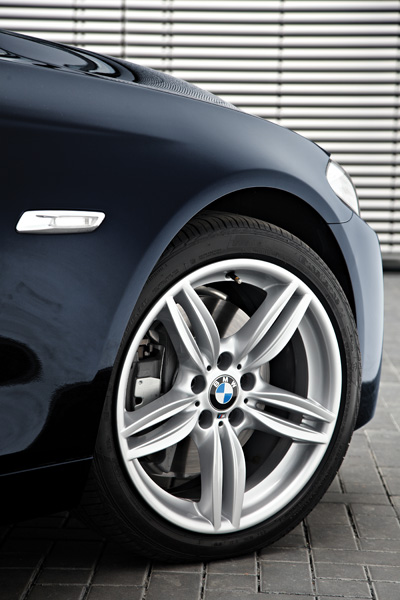
The direct systems use sensors mounted in the valve stems and have a lifespan of six to 10 years of battery life depending on the drive cycles. Inside the wheel wells are the antenna and transponder for the sensor. There are two types of antenna/transponders. The most common transponder is about six by one inch long, the other type looks like a large match box. The antenna/transponder units connect to a control unit that is mounted in the dash or trunk. This unit connects to the vehicle through the CAN BUS.
If you are to take one thing away from this article, it is this: The owner’s manual has all of the TPMS reset procedures for that specific vehicle.
When faced with servicing one of these systems, it important not to panic.
If the vehicle has a full-size spare tire like on some of the X-series SUVs, it is equipped with a sensor. On some of these models, it is required to mount the valve stem in a certain direction in the well. One some models, the pressure can only be monitored when it is mounted. Temporary spares do not have a wheel sensor. If a temporary spare is mounted at any wheel position, the TPMS system will become “Inactive” after several minutes.
Some early systems automatically adjust and recommend pressure settings based on changes in ambient air temperature. If the temperature is significantly cooler than the original initialization temperature for 14 days, the system will display an “Autumn Warning” light, to prompt the driver to recheck and inflate the tires because of cold weather. This feature was drop on most systems after the 2009 model year.

The good news is that scan tools or TPMS-specific tool are not required to reset the system after rotation or sensor replacement. The resetting of sensors on all models can be performed through a button on the dash, turnsignal stalk or the iDrive interface. But, if the system has a malfunction code, a scan tool with the right software can help you pinpoint the problem.
Some BMW models require the use of the iDrive system to reset the TPMS system. The knob is a like a computer mouse that is used to highlight menus and icons on the screen. Once an item is selected, just press down on the wheel.
2007-2010 BMW 1 Series Version with iDrive
1. Inflate tires to recommended pressures.
2. Call up the iMenu on the iDrive screen.
3. Select Settings menu.
4. Select Car/Tires and press controller. If necessary, switch to the top field. Turn controller until “Tires: RDC” is selected and press controller.
5. Start the engine.
6. Select Confirm tire pressure and press controller.
7. Drive off. Initialization is completed during at least 15 minutes of driving.
2007-2010 BMW 1 Series Version without iDrive
1. Inflate all tires to correct pressure specifications.
2. Start engine but do not drive off.
3. Touch the scroll lever on the turn signal stock up or down until the TPMS symbol and the word RESET appear.
4. Press the button on the end of the stalk to confirm selection of Run Flat Indicator.
5. Press and hold for five seconds until a check/tick appears after RESET.
6. Test drive the vehicle to complete the reset.
2006-2008 3-Series (E46)
2009 – 2011 3-Series (E92/E93) without iDrive
1. Inflate all tires to correct pressure specifications.
2. Start the engine, but do not drive off.
3. Push scroll switch on the turn signal stalk up or down, until the TPMS symbol and the word RESET or “INIT” appear in the display.
4. Push button on the end of the stalk to select RESET or “INIT.”
5. Push and hold button 1 (for about 5 seconds) until “resetting” appears, telling you the reset protocols has started.
6. Drive the vehicle for 15 minutes to complete reset. If driving is interrupted, reset will resume at the next drive cycle. There is no need to go through the menu again.
2009-2011 3-Series (E92/E93) with iDrive
1. Inflate all tires to correct pressure specifications.
2. Press the menu button below the iDrive wheel.
3. Use the wheel and select the tab “Vehicle Info” and press the controller.
5. Select “Vehicle Status” and press the controller.
6. Select “RESET TPM” and press the controller.
7. Drive the vehicle for a few minutes to complete reset.
Note: Do not reset system when compact spare tire or snow chains are installed.
2006 3-Series (E46) with iDrive
1. Inflate all tires to correct pressure specification as indicated on the Vehicle Tire Placard.
2. Press the MENU button on the iDrive controlled, press the controller to open the iMenu.
3. Navigate and select “Vehicle Settings.”
5. Select Flat Tire Management or FTM.
6. Start the engine.
7. Select “Set Tire Pressure.”
8. Select “Yes” and press down.
9. Drive the vehicle through various speed ranges to complete reset (about 15 minutes). If driving is interrupted, reset will start again the next drive cycle. There is no need to go through the menu again.
2002-2003 3-Series (E46) Direct Option
1. Inflate all tires (including spare) to correct pressure specification. A full-size spare tire is monitored and should be positioned with the valve stem closest to the right rear wheel well.
2. Turn ignition switch to the ON position.
3. Press and hold the TPMS RESET button for 6 seconds, until “Set Tire Pressure” appears in the instrument cluster display, and/or the TPMS light turns yellow for a few seconds.
2002-2003 3-Series Sedan (E46) FTM (Flat Tire Monitor) Indirect System (Option)
1. Inflate all tires to correct pressure specification.
2. Start the engine.
3. Press and hold the TPMS RESET button until the TPMS light turns yellow for a few seconds.
4. Drive the vehicle through various speed ranges to complete reset (about 15 minutes). If driving is interrupted, reset will resume at the next drive cycle.
2004-2005 3-Series (E46):
2004-2006 X5 (E53)
2003-2008 Z4 Roadster (E85)
2004-2010 X3 (E83)
1. Inflate all tires to correct pressure.
2. Start the engine.
3. Press and hold the TPMS RESET button until the TPMS LED light changes to yellow for a few seconds.
4. Drive the vehicle through various speed ranges for about 15 minutes. If driving is interrupted, reset will resume at the next drive cycle.
Note: Do not reset system when compact spare tire or snow chains are installed.
2010-2010 5-Series GT
2010-2011 X5 (E70)
1. Inflate all tires to correct pressure specification as indicated on the Vehicle Tire Placard.
2. Press the MENU button on the iDrive controller.
3. Open the iMenu.
4. Select “Vehicle Info” and press the controller.
5. Select “Vehicle Status” and press the controller.
6. Select “Reset TPM” and press the controller.
7. Drive for a few minutes to complete reset. If driving is stopped before the proper distance, reset will resume at the next drive cycle. When reset has completed, the tire graphics in the display will turn green.
2007-2010 5 Series Sedan (E60)
2007-2010 6-Series (E63/E64)
2007-2009 X5 (E70)
1. Inflate all tires to correct pressure specification as indicated on the Vehicle Tire Placard.
2. Press MENU button on the iDrive.
3. Press the controller to open the iDrive menu.
4. Select “Vehicle Info” and press the controller.
5. Select “Vehicle Status” and press the controller.
6. Turn controller to select “Reset TPM” and press the controller.
7. Start the engine.
8. Select “Reset” and press.
9. Select “Yes.”
10. Begin driving the vehicle. On the display for the iDrive will say “Status:Resetting TPM”. When the drive cycle is complete the screen will say “Status:TPM Active” indicating when reset is complete.
2004–2006 5-Series (E60)
2004-2006 6-Series (E63/E64)
1. Inflate all tires to correct pressure specification.
2. Press the MENU button.
3. Press the controller to open the iDrive menu.
4. Select Vehicle Settings tab.
5. Select FTM tab.
6. Start the engine.
7. Select “Set Tire Pressure.”
8. Select “Yes.”
9. Start driving the vehicle. The screen will say “Initializing” until the drive cycle is complete. When complete, the screen will say “TPM Active,” indicating system reset. If driving is interrupted, reset will resume at next drive cycle.
2004-2006 7-Series (E65)
1. Inflate all tires to correct pressure specification as indicated on the Vehicle Tire Placard.
2. Start the engine.
3. Press MENU button.
4. Move controller toward SETTINGS and release.
5. Turn controller to select VEHICLE and press the controller.
6. Select “FTM” and press the controller.
7. Select “SET” and press.
8. Begin driving the vehicle. “Status:FTM IS BEING INITIALIZED” will appear in the display. If driving is interrupted, reset will resume at next drive cycle. When reset is complete, “Status:ACTIVE” will appear in the display.
2007–2008 7 Series (E65)
1. Inflate tires to correct specs.
2. Press MENU button.
3. Use the iDrive controller to select “Settings.”
4. Turn controller to select “Vehicle” and press the controller.
5. Select “TPM” and press.
6. Start the engine.
7. Select “Reset” and press.
8. Select “Yes” and press.
9. Begin driving the vehicle. “Status:Resetting TPM” will appear in the display. If driving is interrupted, reset will resume at next drive cycle. “Status:TPM ACTIVE” will appear in the display when reset is complete.
2002-2003 7 Series (E65) FTM (Flat Tire Monitor) Indirect System
1. Inflate all tires to correct pressure specification.
2. Start the engine.
3. Press Menu button on the base of the iDrive controller.
4. Move controller toward “Settings”.
5. Turn controller to select “Vehicle”.
6. Select “FTM” and press.
7. Select “SET” and press.
8. Begin driving the vehicle. The screen will read, “FTM is being initialized”. If driving is interrupted, reset will resume at next drive cycle. When the reset is complete, the display will read “Status:Active” for a moment.
2002 – 2003 7 Series (E65) with TPC (Tire Pressure Control) Direct
TPMS Optional
1. Inflate all tires (including spare) to correct pressure as indicated on Vehicle Tire Placard. The spare tire is monitored and should be positioned with the valve stem closest to the right rear wheel well.
2. Navigate iDrive controller to SETTINGS menu and select RDC function, then SET, then press the controller.
3. Begin driving the vehicle. “INITIALIZING RDC” will appear in the display. If driving is interrupted, reset will resume at next drive cycle. When reset has completed, the tire graphics in the display will turn green, and pressure values will be shown for each tire (except spare).
• Do not reset system when compact spare tire or snow chains are installed.