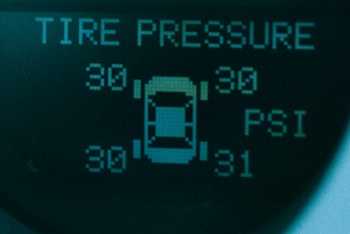
 On early TPMS equipped models, the static relearn process requires a relearn procedure to be initiated on the vehicle’s information center display followed by activating each TPMS in turns to enable each of the TPMS sensors’ unique ID numbers to be loaded into the Wireless Control Module.
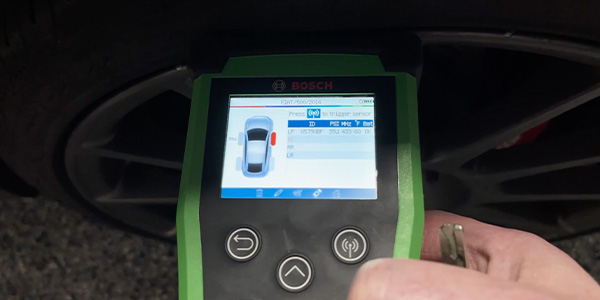
The TPMS tool should be held on the tire adjacent to the valve stem and not directly over the TPMS when activating the sensor. Each time a code has been successfully loaded, the horn acknowledges.
The best way to reprogram the Chrysler systems is with a scan tool or TPMS specific tool. Not only is it faster, but having the ability to confirm that the system has been reset can save your shop comebacks. Also, using a scan tool or TPMS tool can diagnose faulty sensors and weak batteries.
The technician should always refer to manufacturer’s specifications for proper torque requirements when replacing nuts and valve cores; use new grommets, nuts, plastic or nickel-plated valve caps and electro-less, nickel-plated valve cores when performing any tire service; never use a brass valve core or unplated brass cap with an aluminum TPMS sensor stem. Contact between dissimilar metals can cause galvanic corrosion, which can lead to loss of air pressure.
2004-08 Chrysler Pacifica AWD
2005-2010 300/300C
2007-2009 Aspen
2008-2010 PT Cruiser
2009-2010 Sebring Sedan
2005-2007 Town & Country
2008-2010 Avenger
2007-2010 Caliber
2004-2004 Caravan (Option)4X4
2009-2010 Challenger SRT8
2006-2010 Charger
2007-2010 Ram/Durango Trucks
2007-2010 Nitro
2007-2009 Sprinter
1. Inflate all tires to correct pressure specification as indicated on the Vehicle Tire Placard.
2. Park vehicle with the ignition switch set to the off position for 20 minutes.
3. Drive the vehicle faster than 15 mph for at least 20 minutes. The sensor locations and ID numbers will be automatically registered during drive cycle.
During this reset period the instrument panel TPMS indicator may be illuminated. This is normal unless the indicator is flashing. It will turn off after a period of driving at a sufficient speed, usually 1-20 minutes at speeds more than 15-20 mph. If your initial drive is too short, the process will reinitiate the next time the vehicle is driven.
• Alternate Procedure: Perform the TPMS sensor initialization procedure using a scan tool. This will turn off the instrument panel TPMS indicator.
_____________________________________
2002 – 2004 300M (Option)
2004 – 2008 Crossfire (incl. SRT6)
2002 – 2003 Caravan 4X4 (Standard)
1. Inflate all tires to correct pressure specification as indicated on the Vehicle Tire Placard. Calculate for air temperature.
2. Press MENU key on the electronic vehicle information center until RETRAIN TIRE SENSORS-NO is displayed.
3. Press STEP button until YES appears.
4. Press MENU button to select YES, causing display to read TRAIN LEFT FRONT TIRE.
5. Place activation tool on the left front tire valve stem. The tool should remain in place for approximately five seconds, until the horn sounds.
6. Repeat procedure for the remaining sensors in this sequence: right front, right rear, left front and spare.
7. After all four or five sensors have been reset, the electronic vehicle information center will display: TRAINING COMPLETE.If TRAINING ABORTED appears on the electronic vehicle information center at any time, move the vehicle ahead at least one foot and restart procedure.
8. Press either MENU, RESET, STEP or C/T on the electronic driver information center to exit the reset procedure.
Learn mode will cancel if the system is not re-trained within the allotted time and the procedure will have to be repeated for all tires.
____________________________________________
1997 – 2002 Prowler
1. Inflate tires to correct pressure specification as indicated on the Vehicle Tire Placard.
2. Install scan tool.
3. Navigate scan tool CHASSIS SYSTEM menu to TIRE PRESSURE MONITOR, then MISCELLANEOUS.
4. Select wheel position (to program one sensor) or PROGRAM MODULE to program all four sensors in the sequence: right front, right rear and left rear.
5. Place activation tool on the selected valve stem, or on the left front valve stem if programming all 4 sensors. When that sensor is programmed, a scan tool will show PROGRAM TRANSMITTER COMPLETE.
6. If programming all four sensors, repeat the process for the other tires in the following sequence: right front, right rear, spare and left rear.
7. After the sensor(s) have been programmed, exit procedure on DRBIII scan tool.
8. Use the SENSOR DISPLAY function of the scan tool to verify sensor programming.
______________________________
2004 – 2008 Crossfire (incl. SRT6)
NOTE: The learn mode will cancel if the system is not re-trained within the allotted time and the procedure will have to be repeated for all tires.
1. Inflate all tires to correct pressure specification as indicated on the Vehicle Tire Placard.
2. Install scan tool.
3. Navigate scan tool CHASSIS SYSTEM menu to MISCELLANEOUS FUNCTIONS.
4. Select TRAIN ALL MODE then YES.
5. Place activation tool on the left front tire valve stem. When that sensor is programmed, the scan tool will beep.
6. Repeat procedure for the remaining sensors in the order indicated.
7. After all sensors have been programmed and TRAINING COMPLETED is displayed, exit procedure on scan tool.
8. Use the SENSOR DISPLAY or INPUT/OUTPUT DISPLAY functions of the scan tool to verify sensor programming.


